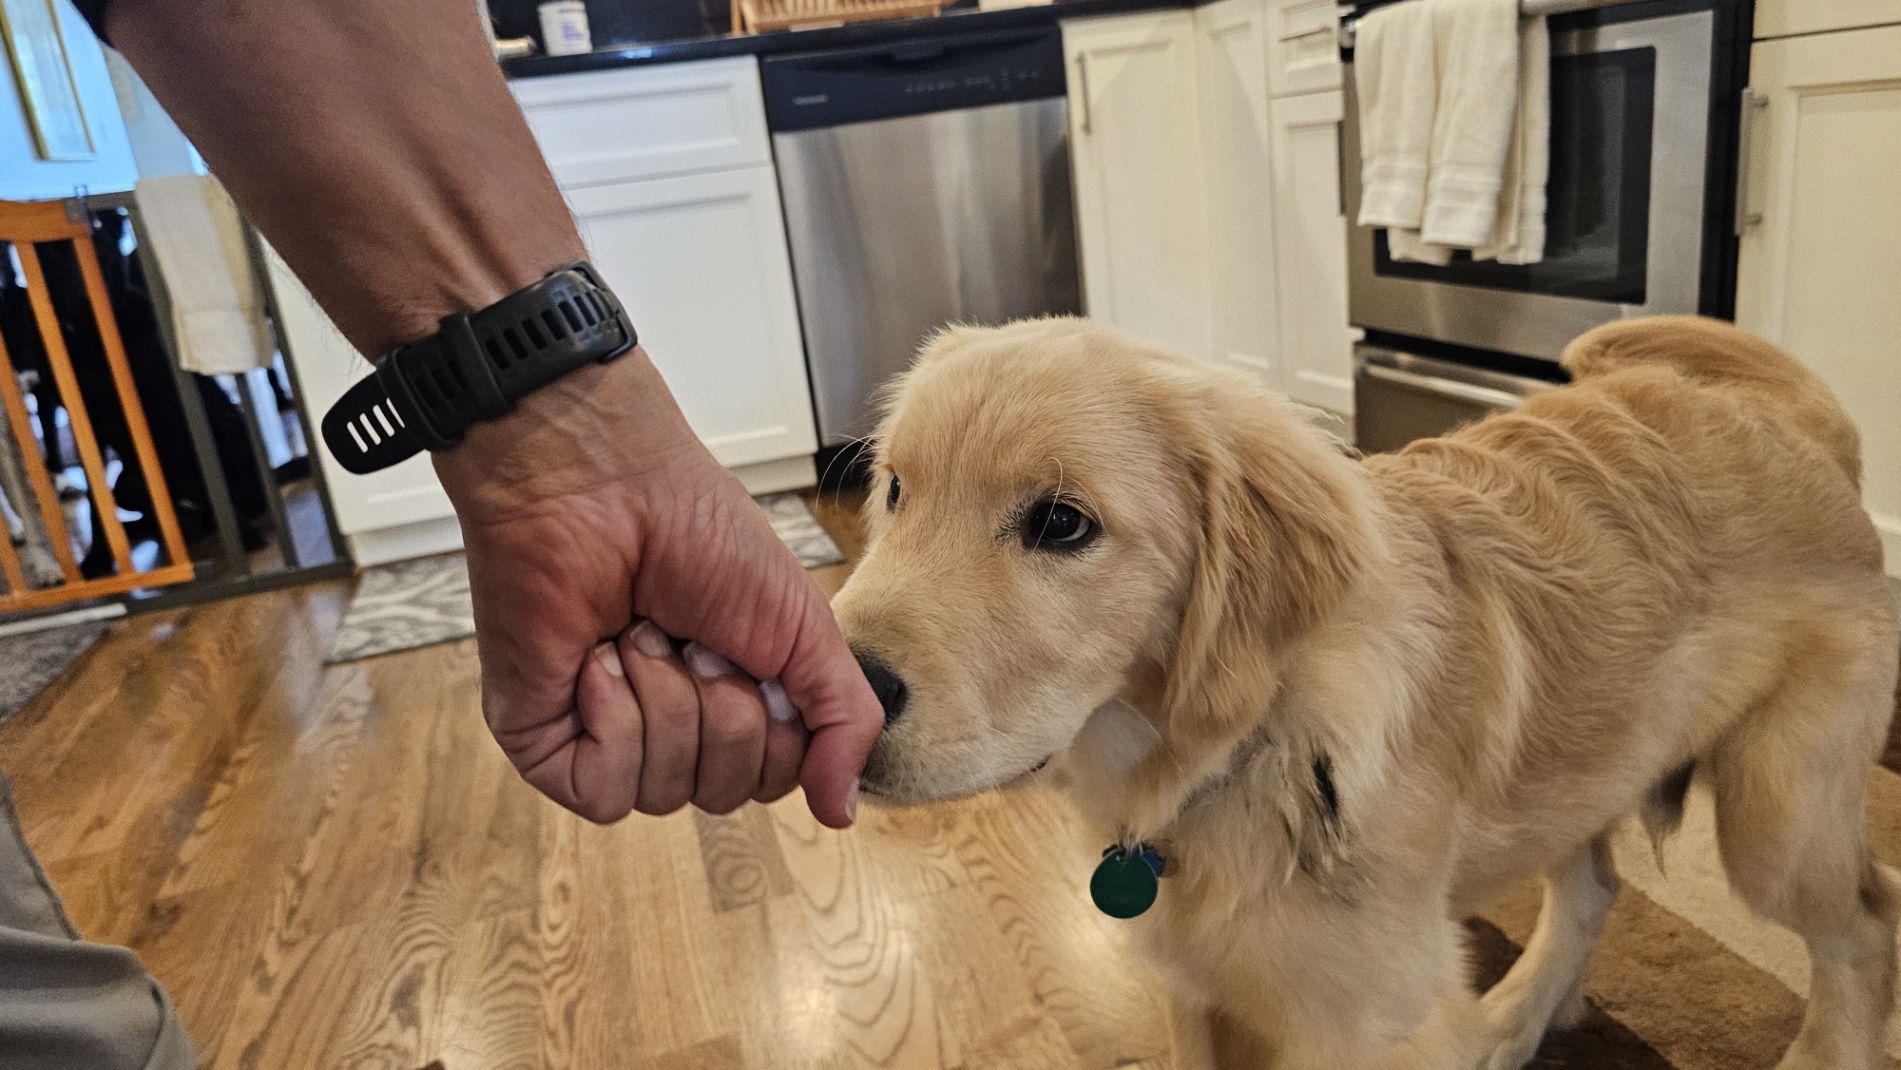
The hand target is one of the most powerful and practical skills you can teach your dog. It’s simple to train, fun for you and your dog, and opens the door to countless useful applications, from object exchange to the ever-important recall.
When your dog learns to touch your hand with their nose on cue, you’ve created a clear, reliable way to communicate. It’s not just a trick, it’s a behavior that builds trust, focus, and safety for your dog.
🐕 How the Hand Target Builds a Reliable Recall
A dog that happily targets your hand is a dog that will come to you when called. Instead of ignoring you, running away or stopping halfway, your dog knows exactly what to do: move toward you and make contact.
That simple motion eliminates confusion. No more chasing, calling your dog’s name repeatedly, or trying to grab its collar. With hand targeting, your recall becomes:
Predictable: Your dog understands exactly what earns a reward.
Rewarding: It’s reinforced through fun, fast-paced practice.
Safe: Your dog comes to you willingly, without pressure or hesitation.
As you practice, your dog begins to associate coming when called with the same positive emotion they feel when performing a hand target. Eventually, the cue for recall and the hand target become one and the same.
🦴 Everyday Applications
Once your dog knows the hand target, it becomes your go-to communication tool:
🐶 Call your dog away from distractions (like another dog or squirrel).
👦 Get your dog to disengage with your small child that’s trying to avoid being jumped on.
🏡 Get your dog off furniture or away from the counter.
🚪 Ask your dog to come inside without frustration or chasing.
😄 Stop unwanted behavior without scolding. i.e. ask for a hand target instead of yelling, “stop chewing on the rug.”
🧠 Strengthen focus and engagement during walks or play. You will also elevate the bond you’re creating with your dog.
The more ways you use it, the stronger and more reliable the behavior becomes.
🐕🦺 Training Made Easy
If you haven’t taught your dog the hand target yet, start with our step-by-step guide:
You’ll find a full breakdown of how to introduce the cue, increase distance, and build reliability. All based on positive reinforcement and gradual progress.
🗣️ Transitioning to a Verbal Cue
Once your dog fully understands the hand target and can perform it confidently in multiple rooms in your home and in the face of mild distractions like your backyard, it’s time to insert a verbal cue right before presenting your hand cue.
Humans are verbal communicators while dogs rely on movement and body language, so we always begin with a physical cue only first.
When transitioning to a verbal cue, follow this order of operations:
Say your chosen verbal cue (for example, “come”).
Wait 1/2 second and then show your physical cue.
Your dog moves toward you and touches your hand.
Offer verbal praise (e.g., “good girl!”).
Reinforce the behavior with a food reward. Highly salient treats are important. Full Moon Beef Jerky Strips are my go-to!
Once your dog responds consistently, begin fading the physical cue by making it smaller and less obvious over time until your dog responds to your verbal cue alone.
The hand target is the foundation of a trust-based recall. By practicing this simple skill, you’re teaching your dog to move toward you confidently, focus amid distractions, and enjoy coming when called.
Start small, practice often, and make it rewarding. Before long, you’ll have a recall that’s not only reliable, it’s joyful!
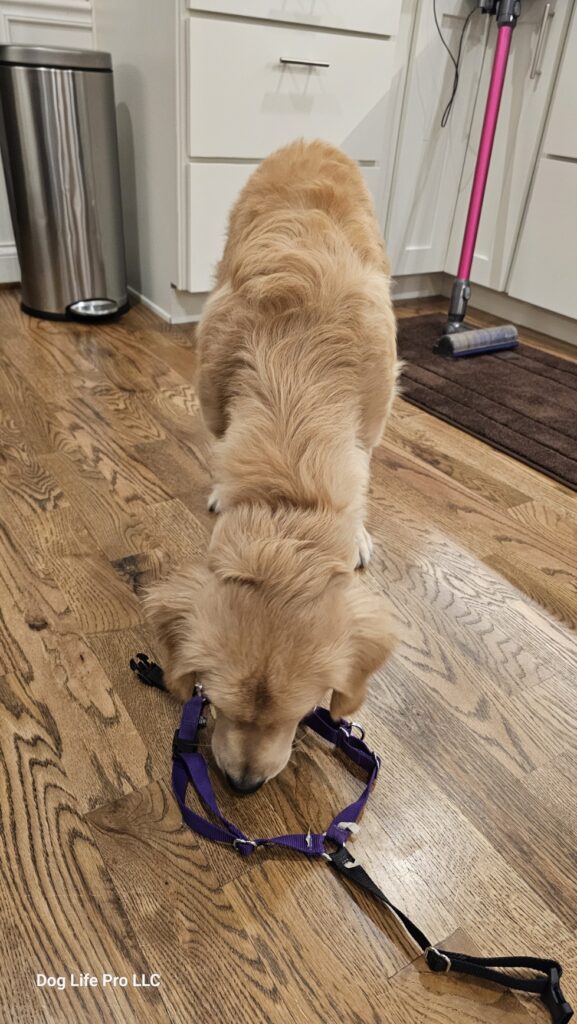
Watch Watson run back to me in a moderate to high level of distraction – exploring by a riverbank. I’m using the verbal cue “touch” and the physical cue of two fingers extended downward. He will come for either cue independently now.
[mc4wp_form id="3110"]
🐾 Why the Hand Target Is a Must-Have Skill
The hand target is one of the most powerful and practical skills you can teach your dog. It’s simple to train, fun for you and your dog, and opens the door to countless useful applications, from object exchange to the ever-important recall.
When your dog learns to touch your hand with their nose on cue, you’ve created a clear, reliable way to communicate. It’s not just a trick, it’s a behavior that builds trust, focus, and safety for your dog.
🐕 How the Hand Target Builds a Reliable Recall
A dog that happily targets your hand is a dog that will come to you when called. Instead of ignoring you, running away or stopping halfway, your dog knows exactly what to do: move toward you and make contact.
That simple motion eliminates confusion. No more chasing, calling your dog’s name repeatedly, or trying to grab its collar. With hand targeting, your recall becomes:
Predictable: Your dog understands exactly what earns a reward.
Rewarding: It’s reinforced through fun, fast-paced practice.
Safe: Your dog comes to you willingly, without pressure or hesitation.
As you practice, your dog begins to associate coming when called with the same positive emotion they feel when performing a hand target. Eventually, the cue for recall and the hand target become one and the same.
🦴 Everyday Applications
Once your dog knows the hand target, it becomes your go-to communication tool:
🐶 Call your dog away from distractions (like another dog or squirrel).
👦 Get your dog to disengage with your small child that’s trying to avoid being jumped on.
🏡 Get your dog off furniture or away from the counter.
🚪 Ask your dog to come inside without frustration or chasing.
😄 Stop unwanted behavior without scolding. i.e. ask for a hand target instead of yelling, “stop chewing on the rug.”
🧠 Strengthen focus and engagement during walks or play. You will also elevate the bond you’re creating with your dog.
The more ways you use it, the stronger and more reliable the behavior becomes.
🐕🦺 Training Made Easy
If you haven’t taught your dog the hand target yet, start with our step-by-step guide:
You’ll find a full breakdown of how to introduce the cue, increase distance, and build reliability. All based on positive reinforcement and gradual progress.
🗣️ Transitioning to a Verbal Cue
Once your dog fully understands the hand target and can perform it confidently in multiple rooms in your home and in the face of mild distractions like your backyard, it’s time to insert a verbal cue right before presenting your hand cue.
Humans are verbal communicators while dogs rely on movement and body language, so we always begin with a physical cue only first.
When transitioning to a verbal cue, follow this order of operations:
Say your chosen verbal cue (for example, “come”).
Wait 1/2 second and then show your physical cue.
Your dog moves toward you and touches your hand.
Offer verbal praise (e.g., “good girl!”).
Reinforce the behavior with a food reward. Highly salient treats are important. Full Moon Beef Jerky Strips are my go-to!
Once your dog responds consistently, begin fading the physical cue by making it smaller and less obvious over time until your dog responds to your verbal cue alone.
The hand target is the foundation of a trust-based recall. By practicing this simple skill, you’re teaching your dog to move toward you confidently, focus amid distractions, and enjoy coming when called.
Start small, practice often, and make it rewarding. Before long, you’ll have a recall that’s not only reliable, it’s joyful!
Watch Watson run back to me in a moderate to high level of distraction – exploring by a riverbank. I’m using the verbal cue “touch” and the physical cue of two fingers extended downward. He will come for either cue independently now.
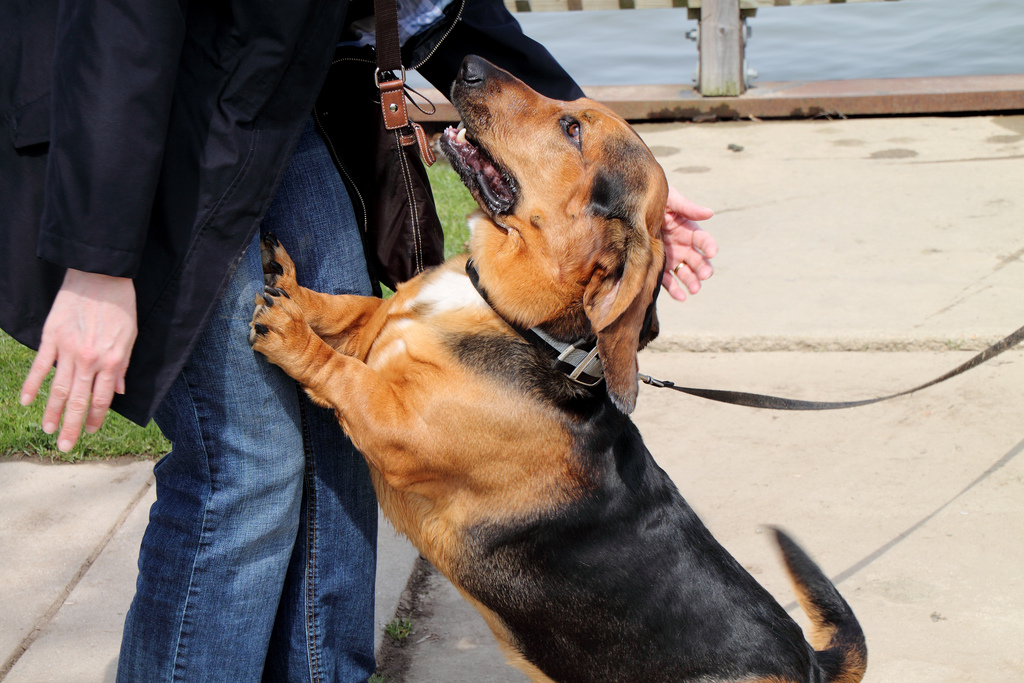
Dogs don’t jump to “dominate” or “disobey.” They jump because it works. From a puppy’s point of view, jumping has always gotten results in the form of eye contact, talking, touching, even pushing your dog off and saying no is attention and reinforces the behavior.
Attention is rewarding for your dog. So every time we say “no,” push them off, welcome their affection, or even look at them, we’re actually making the behavior we don’t want stronger!
It’s important to understand that jumping on you may not bother you and you may even like it, and that’s okay. However, your guests, children or people you meet on the street may not like it because they’re wearing nice clothes or they’re intimidated by dogs. Also, older people and children are scratched more easily because of their softer skin.
The solution is to teach your dog to jump on you when you ask (on cue). This turns it into a trained behavior rather than an impulsive one.
But first, you have to stop the uninvited jump.
🙈 The Power of Negative Punishment
In behavioral science, negative punishment means taking away something the dog wants in order to reduce a behavior. In this case, what your dog wants is you.
So instead of scolding, pushing, or saying “off,” the most effective thing you can do is:
Don’t speak.
Don’t look.
Don’t touch.
Instead, quickly turn away.
If you turn and bend down to your dog as soon as their paws are on the ground, you’ll help them learn “four paws on the floor makes attention happen. Jumping makes it go away.” Repeat this every time for faster results.
If you just want to manage the behavior (prevent it and stop it from becoming stronger) because it’s not a good time for you to have a learning moment, turn away and do not give them your attention while they are jumping.
🚪 When Turning Away Isn’t Enough
Some dogs are more persistent, and they’ll jump on your back, nip your pants, or bark for you to turn around. When that happens:
Calmly, but quickly androbotically (repeat with no emotion) walk away.
Step into another room.
Close the door for a 3 – 5 seconds.
Re-enter to give your dog another chance.
If they jump again, repeat. Your dog will quickly learn that the only way to make you stay (and get your attention) is by keeping all four paws on the floor.
Leave the room without returning to manage, but if you have time, and patience slowly open the door and attempt to enter. As soon as you see paws leaving the ground slowly start closing the door. This opening and closing of the door sends the same message as turning away and back: “four paws on the floor makes attention happen. Jumping makes it go away.” Repeat this every time for faster results.
👥 When Guests Come Over
When new people arrive, excitement peaks, and guests won’t have had the opportunity to practice, like you have, so it’s not fair to expect them to strictly follow your guidance. Instead, manage jumping behavior by using a leash and harness:
Clip the leash to your dog’s harness.
Stand on the leash so your dog has just enough slack to stand, but not jump.
Ask guests to ignore the dog until all four paws are on the floor.
Once calm behavior happens, that’s when attention can return.
💡 Stay Consistent
Consistency is everything. If jumping sometimes gets attention, (remember, even a look is attention) your dog will try even harder. You’ve just taught your dog persistence. But if every single time jumping makes attention disappear, and every single time calm behavior earns attention, your dog will learn fast!
Some dogs learn quickly, but it takes time for other. How long they’ve practiced this behavior is a big part of this but stick with it. It always works.
🐶⬆️ Teaching Your Dog to Jump on Cue
It’s perfectly fine to enjoy your dog jumping on you. Many people love that greeting. What’s important is teaching your dog when it’s okay and when it’s not. That way, your dog can still express affection without jumping on others uninvited.
To do this right, follow these steps:
Eliminate uninvited jumping first. Before teaching your dog to jump on cue, they must understand that spontaneous or uninvited jumping never works. Only when you ask for it will it be rewarded.
Wait until your dog is past puppyhood. Around 1.5 years old is a good time to start, once joints are mature and balance is stable. Puppies shouldn’t be encouraged to jump because of their developing joints, and it encourages their impulsive nature.
Introduce a clear cue. Start by patting both palms on your chest while standing. If your dog doesn’t jump, that’s great, it just means your earlier training was effective.
Make it easier if needed. Try kneeling or sitting in a chair to lower your body height. Pat your chest again. If your dog still doesn’t jump, use a visible treat in your hand as a lure as you pat your chest.
Fade the lure. After just a few repetitions (4–5 is usually enough), practice without the treat in your hand. You want the chest pat itself to become the cue, not the sight of the food.
Keep greetings structured. Practice in short sessions and always end before your dog gets overly excited. Remember, this is an invited behavior, not a free-for-all.
Need help refining it or changing it to a verbal cue? Visit www.doglifepro.com for help fading the lure and shaping the cue into a clean, reliable behavior. Just a couple of chest pats. Here’s a link on how to develop a verbal cue.
If your dog runs out the door the moment you open it, you’re not alone. This behavior, often called door dashing, is extremely common.
Dogs bolt through doors because:
Doors predict walks, freedom, or excitement
Rushing has worked in the past
They haven’t learned how to pause and wait
Trainers know that outdoors is one of the four major “life rewards” for dogs. Meeting people, meeting other dogs, and chewing bones are the other three.
This isn’t stubbornness or defiance. It’s a lack of impulse control combined with excitement for the outdoors.
🐾 Why Door Dashing Is a Serious Safety Issue
A dog that bolts out the door is at real risk of:
Being hit by a car, particularly for Oak Park residents living near busy roads like Harlem or I-290
Getting lost
Getting maced or bitten by fearful people or their dogs
Knocking over children or older adults
This is especially important for:
Reactive or territorial dogs
Dogs with a strong prey drive
Dogs that have tried to run away before
Stopping a dog from bolting out the door is about management and training, not punishment.
🐾 The Training Concept That Stops Door Dashing
This is one of the easiest skills to teach your dog, because the reward (outdoors) is so important. We’re going to teach your dog this simple rule:
Calm behavior makes doors open. Rushing makes doors close.
Dogs clearly understand this pattern because you’re communicating with them through physical movement, which is the primary way dogs communicate, rather than relying on verbal cues.
This is a form of impulse control training that carries over into many other situations.
🐾 Step-by-Step: Teach Your Dog to Wait at the Door
Step 1: Start at the Door
Open the door slowly and step into the opening, facing your dog, as you do this.
Pause in the doorway before moving through.
Step 2: Wait for Attention
Look at your dog and wait for eye contact.
The moment your dog looks at you:
Praise immediately – Good Boy! And simultaneously…
Open the door enough to step through, and then
Use a clear arm motion to invite your dog to follow
At first, you are reinforcing attention, not sitting.
Step 3: Increase the Difficulty
Now repeat Step 2, but increase the criteria. After eye contact, wait quietly until your dog sits. Don’t ask, just wait.
When this happens:
Praise immediately – Good Boy! And simultaneously…
Open the door enough to step through, and then
Use a clear arm motion to invite your dog to follow
This teaches your dog to wait at the door instead of rushing it.
🐾 What If My Dog Tries to Bolt Anyway?
That’s normal during training.
If your dog breaks position or tries to run past you:
Close the door immediately, as soon as their butt comes off the ground.
Wait for your dog to reset
Try again slowly but be ready to close the door as soon as they begin to break their sit.
Dogs learn quickly that:
Bolting makes the door close
Waiting makes the door open
This clarity is what changes the behavior long-term.
🐾 Consistency Is the Key to Success
If sometimes your dog is allowed to rush out the door ahead of you and other times isn’t, the behavior will never fully resolve.
For best results:
Everyone in the household must follow the same rules
Practice at every exit, not just walks
Be patient but consistent
This is how you build reliable impulse control.
🐾 Final Thoughts
If your dog runs out the door when you open it, the solution is often as simple as giving yourself a little extra time when leaving and following the steps above. If you’re having trouble or just want guidance tailored to your dog, don’t hesitate to reach out for training support.
Don’t hesitate to use a leash during training so you can prevent your dog from escaping if they manage to get past you.
Keep your dog’s collar and ID tags on while practicing, in case they do get away and become lost.
Clear rules, calm repetition, and consistency will:
Stop door dashing
Make exits and entrances safer for everyone
Improve impulse control. Many veterinary behavior organizations, including the American Veterinary Society of Animal Behavior, emphasize teaching dogs impulse control skills rather than relying on punishment-based methods.
🐾 Example Videos
Here are a couple of different examples of threshold training with Cheese and Bear.
Example 1:
Bear knows that I go through the door first, but he still needs me to step in front of him to remember. He’s only a year old! He’s almost to the point where I can just open the door and he’ll wait for me.
Example 2:
Cheese is at least 5 years old now and I just ask him to sit because he’s not at my home enough to know the criteria for exiting, but he displays great impulse control and is happy to do what I ask.
[mc4wp_form id="3110"]
🐾 Why Dogs Run Out the Door
If your dog runs out the door the moment you open it, you’re not alone. This behavior, often called door dashing, is extremely common.
Dogs bolt through doors because:
Doors predict walks, freedom, or excitement
Rushing has worked in the past
They haven’t learned how to pause and wait
Trainers know that outdoors is one of the four major “life rewards” for dogs. Meeting people, meeting other dogs, and chewing bones are the other three.
This isn’t stubbornness or defiance. It’s a lack of impulse control combined with excitement for the outdoors.
🐾 Why Door Dashing Is a Serious Safety Issue
A dog that bolts out the door is at real risk of:
Being hit by a car, particularly for Oak Park residents living near busy roads like Harlem or I-290
Getting lost
Getting maced or bitten by fearful people or their dogs
Knocking over children or older adults
This is especially important for:
Reactive or territorial dogs
Dogs with a strong prey drive
Dogs that have tried to run away before
Stopping a dog from bolting out the door is about management and training, not punishment.
🐾 The Training Concept That Stops Door Dashing
This is one of the easiest skills to teach your dog, because the reward (outdoors) is so important. We’re going to teach your dog this simple rule:
Calm behavior makes doors open. Rushing makes doors close.
Dogs clearly understand this pattern because you’re communicating with them through physical movement, which is the primary way dogs communicate, rather than relying on verbal cues.
This is a form of impulse control training that carries over into many other situations.
🐾 Step-by-Step: Teach Your Dog to Wait at the Door
Step 1: Start at the Door
Open the door slowly and step into the opening, facing your dog, as you do this.
Pause in the doorway before moving through.
Step 2: Wait for Attention
Look at your dog and wait for eye contact.
The moment your dog looks at you:
Praise immediately – Good Boy! And simultaneously…
Open the door enough to step through, and then
Use a clear arm motion to invite your dog to follow
At first, you are reinforcing attention, not sitting.
Step 3: Increase the Difficulty
Now repeat Step 2, but increase the criteria. After eye contact, wait quietly until your dog sits. Don’t ask, just wait.
When this happens:
Praise immediately – Good Boy! And simultaneously…
Open the door enough to step through, and then
Use a clear arm motion to invite your dog to follow
This teaches your dog to wait at the door instead of rushing it.
🐾 What If My Dog Tries to Bolt Anyway?
That’s normal during training.
If your dog breaks position or tries to run past you:
Close the door immediately, as soon as their butt comes off the ground.
Wait for your dog to reset
Try again slowly but be ready to close the door as soon as they begin to break their sit.
Dogs learn quickly that:
Bolting makes the door close
Waiting makes the door open
This clarity is what changes the behavior long-term.
🐾 Consistency Is the Key to Success
If sometimes your dog is allowed to rush out the door ahead of you and other times isn’t, the behavior will never fully resolve.
For best results:
Everyone in the household must follow the same rules
Practice at every exit, not just walks
Be patient but consistent
This is how you build reliable impulse control.
🐾 Final Thoughts
If your dog runs out the door when you open it, the solution is often as simple as giving yourself a little extra time when leaving and following the steps above. If you’re having trouble or just want guidance tailored to your dog, don’t hesitate to reach out for training support.
Don’t hesitate to use a leash during training so you can prevent your dog from escaping if they manage to get past you.
Keep your dog’s collar and ID tags on while practicing, in case they do get away and become lost.
Clear rules, calm repetition, and consistency will:
Stop door dashing
Make exits and entrances safer for everyone
Improve impulse control. Many veterinary behavior organizations, including the American Veterinary Society of Animal Behavior, emphasize teaching dogs impulse control skills rather than relying on punishment-based methods.
🐾 Example Videos
Here are a couple of different examples of threshold training with Cheese and Bear.
Example 1:
Bear knows that I go through the door first, but he still needs me to step in front of him to remember. He’s only a year old! He’s almost to the point where I can just open the door and he’ll wait for me.
Example 2:
Cheese is at least 5 years old now and I just ask him to sit because he’s not at my home enough to know the criteria for exiting, but he displays great impulse control and is happy to do what I ask.
Oak Park is one of the most dog-friendly communities in the Chicago area, and that matters more than many dog owners realize. The environment your dog lives in plays a huge role in how easily they learn, adapt, and socialize. From walkable neighborhoods to accessible green space and a strong dog-owning community, Oak Park offers unique advantages that make dog training and socialization easier and more effective.
🐾 A Dog-Friendly Community That Encourages Healthy Social Exposure
One of the biggest advantages of owning a dog in Oak Park is how common dogs are in everyday life. Many residents are dog owners, which naturally creates more opportunities for controlled, positive exposure to other dogs.
This makes it easier to:
✔️ Set up playdates with neighbors’ dogs ✔️ Practice calm leash walking past other dogs ✔️ Help puppies and adult dogs feel comfortable around unfamiliar dogs
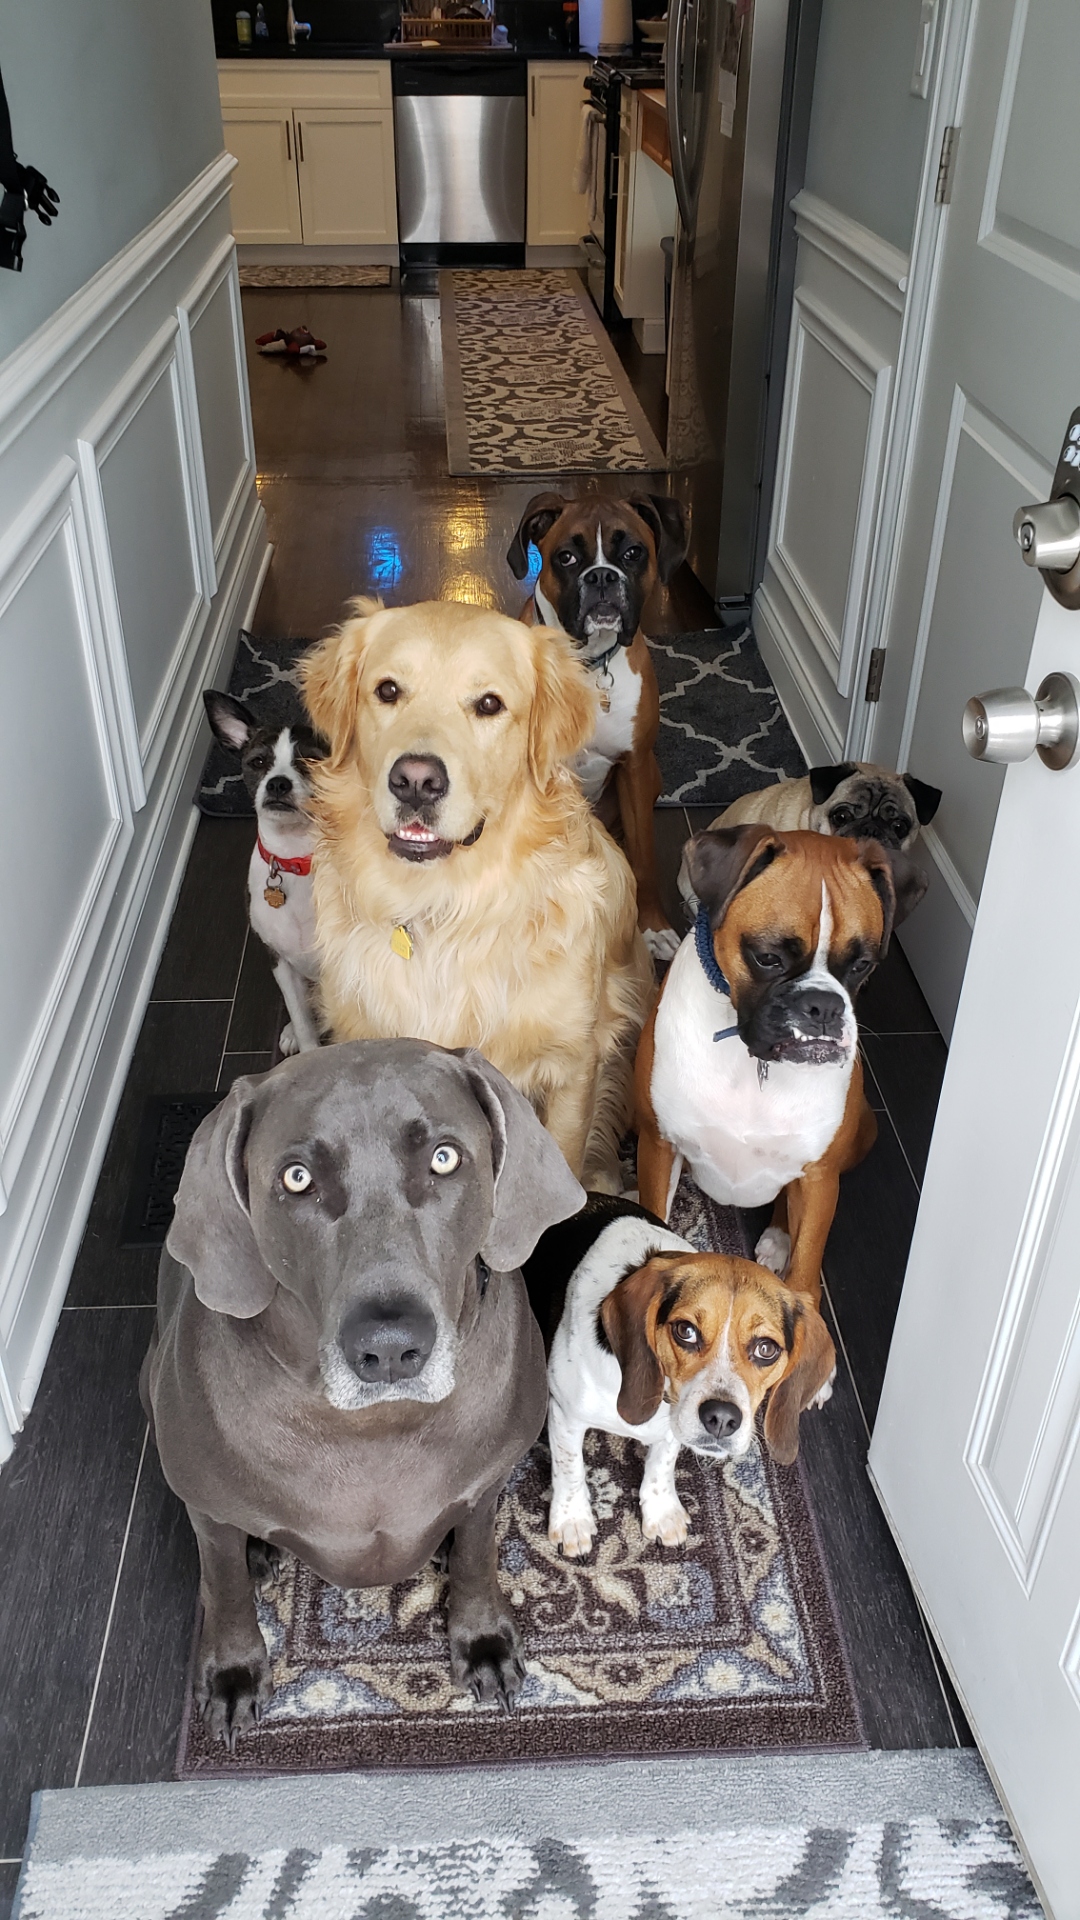
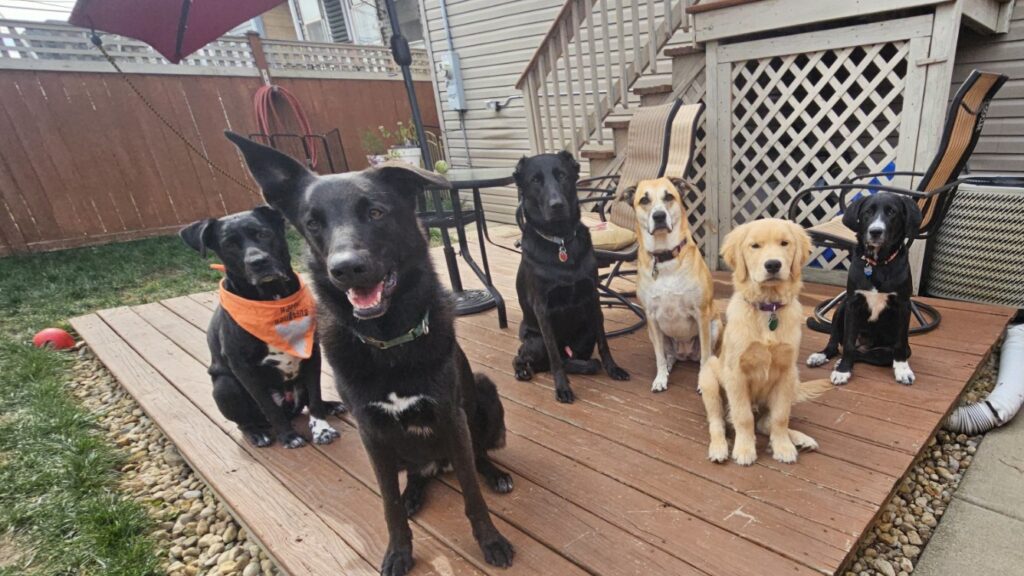
Regular, low-pressure exposure like this is a critical part of healthy social development. Dogs that grow up seeing other dogs in normal, everyday situations are far more likely to remain calm at block parties, farmers markets, outdoor concerts, and community festivals later in life.
🌳 Parks That Allow Gradual, Low-Stress Training Sessions
Oak Park has several small to medium-sized parks that are ideal for training and socializing young puppies as well as anxious, reactive, or easily overstimulated dogs.
Unlike crowded dog parks, many of Oak Park’s green spaces allow you to:
✔️ Start training hundreds of feet away from distractions, often in the middle of a walking path or open field ✔️ Gradually decrease distance as your dog becomes more comfortable ✔️ Practice real-world skills without overwhelming your dog
Mills, Scoville, Barrie, Lindberg, and Maple parks are all good options that aren’t typically crowded, especially during the week. One of my personal favorites, just three miles away in nearby River Forest, is the Miller Meadow Forest Preserve. This area has large open grassy spaces that are ideal for starting dogs with higher levels of anxiety. There’s also a pretty big off-leash dog park for the social butterfly and high energy dogs out there.
This kind of controlled exposure is far more effective than bringing a dog into a busy environment and hoping they “get used to it.” For many dogs, especially those struggling with fear or reactivity, Oak Park’s park layout makes humane, confidence-building training much easier.
🏙️ A Real-World Environment That Builds Reliable Training Skills
Oak Park has a unique mix of residential homes, apartment buildings, and higher-density areas. From a training perspective, this is actually a major benefit.
Dogs raised and trained in this type of environment naturally encounter:
✔️ Elevators and stairwells ✔️ Higher levels of foot traffic, strollers, and joggers ✔️ Bikes, scooters, and passing cars ✔️ Neighbors entering and exiting buildings
This creates more opportunities for socialization without the level of overstimulation dogs might experience in denser parts of Chicago.
When training and socialization are done properly, these everyday experiences help dogs build confidence and learn to remain calm in the situations they’ll face for the rest of their lives.
🐶 Access to Professional Dog Training and Support
Because Oak Park has a large dog-owning population, professional dog care services are readily available. This makes it easier for owners to find:
✔️ Experienced dog trainers ✔️ Reliable dog walkers ✔️ In-home boarding and supervised care
Having access to professional support that comes to you can make addressing leash pulling, reactivity, barking, jumping, anxiety, or impulse control much easier. Early, evidence-based guidance helps prevent small issues from becoming long-term behavior problems.
🎯 Ready to Start Training Your Dog in Oak Park?
Oak Park provides an excellent foundation for dog training, but environment alone isn’t enough. Training still needs to be humane, structured, and tailored to the individual dog and their family.
If you’re dealing with leash pulling, reactivity, jumping, barking, or impulse control, private in-home training will help far more than a one-size-fits-all puppy class. Personalized training allows you and your dog to take full advantage of everything Oak Park has to offer, without overwhelming either of you.
Note: Puppy classes are still valuable and recommended for early socialization. Private training and group classes often work best together.
Owning a dog in Oak Park comes with real advantages, especially when training and socialization are approached thoughtfully. With the right guidance, dogs can learn to navigate busy neighborhoods, social settings, and community events calmly and confidently for years to come. And honestly, who doesn’t want their dog to be the talk of the neighborhood?
Calm group socialization helps dogs learn to relax around other dogs in real-world settings.
[mc4wp_form id="3110"]
Oak Park is one of the most dog-friendly communities in the Chicago area, and that matters more than many dog owners realize. The environment your dog lives in plays a huge role in how easily they learn, adapt, and socialize. From walkable neighborhoods to accessible green space and a strong dog-owning community, Oak Park offers unique advantages that make dog training and socialization easier and more effective.
🐾 A Dog-Friendly Community That Encourages Healthy Social Exposure
One of the biggest advantages of owning a dog in Oak Park is how common dogs are in everyday life. Many residents are dog owners, which naturally creates more opportunities for controlled, positive exposure to other dogs.
This makes it easier to:
✔️ Set up playdates with neighbors’ dogs ✔️ Practice calm leash walking past other dogs ✔️ Help puppies and adult dogs feel comfortable around unfamiliar dogs
Regular, low-pressure exposure like this is a critical part of healthy social development. Dogs that grow up seeing other dogs in normal, everyday situations are far more likely to remain calm at block parties, farmers markets, outdoor concerts, and community festivals later in life.
🌳 Parks That Allow Gradual, Low-Stress Training Sessions
Oak Park has several small to medium-sized parks that are ideal for training and socializing young puppies as well as anxious, reactive, or easily overstimulated dogs.
Unlike crowded dog parks, many of Oak Park’s green spaces allow you to:
✔️ Start training hundreds of feet away from distractions, often in the middle of a walking path or open field ✔️ Gradually decrease distance as your dog becomes more comfortable ✔️ Practice real-world skills without overwhelming your dog
Mills, Scoville, Barrie, Lindberg, and Maple parks are all good options that aren’t typically crowded, especially during the week. One of my personal favorites, just three miles away in nearby River Forest, is the Miller Meadow Forest Preserve. This area has large open grassy spaces that are ideal for starting dogs with higher levels of anxiety. There’s also a pretty big off-leash dog park for the social butterfly and high energy dogs out there.
This kind of controlled exposure is far more effective than bringing a dog into a busy environment and hoping they “get used to it.” For many dogs, especially those struggling with fear or reactivity, Oak Park’s park layout makes humane, confidence-building training much easier.
🏙️ A Real-World Environment That Builds Reliable Training Skills
Oak Park has a unique mix of residential homes, apartment buildings, and higher-density areas. From a training perspective, this is actually a major benefit.
Dogs raised and trained in this type of environment naturally encounter:
✔️ Elevators and stairwells ✔️ Higher levels of foot traffic, strollers, and joggers ✔️ Bikes, scooters, and passing cars ✔️ Neighbors entering and exiting buildings
This creates more opportunities for socialization without the level of overstimulation dogs might experience in denser parts of Chicago.
When training and socialization are done properly, these everyday experiences help dogs build confidence and learn to remain calm in the situations they’ll face for the rest of their lives.
🐶 Access to Professional Dog Training and Support
Because Oak Park has a large dog-owning population, professional dog care services are readily available. This makes it easier for owners to find:
✔️ Experienced dog trainers ✔️ Reliable dog walkers ✔️ In-home boarding and supervised care
Having access to professional support that comes to you can make addressing leash pulling, reactivity, barking, jumping, anxiety, or impulse control much easier. Early, evidence-based guidance helps prevent small issues from becoming long-term behavior problems.
🎯 Ready to Start Training Your Dog in Oak Park?
Oak Park provides an excellent foundation for dog training, but environment alone isn’t enough. Training still needs to be humane, structured, and tailored to the individual dog and their family.
If you’re dealing with leash pulling, reactivity, jumping, barking, or impulse control, private in-home training will help far more than a one-size-fits-all puppy class. Personalized training allows you and your dog to take full advantage of everything Oak Park has to offer, without overwhelming either of you.
Note: Puppy classes are still valuable and recommended for early socialization. Private training and group classes often work best together.
Owning a dog in Oak Park comes with real advantages, especially when training and socialization are approached thoughtfully. With the right guidance, dogs can learn to navigate busy neighborhoods, social settings, and community events calmly and confidently for years to come. And honestly, who doesn’t want their dog to be the talk of the neighborhood?
Calm group socialization helps dogs learn to relax around other dogs in real-world settings.
If your dog backs away, hides, or runs the moment the harness comes out, you’re not alone. Many dogs develop anxiety around handling — especially when something goes over their head or tightens around their body.
The good news? With the right approach, any dog can learn to feel safe, relaxed, and even excited about their harness.
This guide explains why harness avoidance happens and shows you exactly how to fix it using reward-based acclimation and fear-free handling methods.
🎬 Why Dogs Become Afraid of Their Harness
Dogs can develop negative associations with harnesses for several reasons:
😵 Over-the-head fear — Many dogs dislike equipment moving near their face.
😣 Past discomfort — Putting the harness on without being gentle or accidentally pinching hair or skin in a buckle.
🚫 Rushing the process — Putting the harness on too quickly or forcefully.
🐶 Lack of early handling training — Common in rescues and under-socialized dogs.
These experiences can build up until “harness = danger,” causing your dog to avoid you with a harness — even if he loves walks.
🍗 Step 1: Build a Positive Association with the Harness
Your goal is simple: Harness appears → good things happen.
Place the harness on the floor.
Put a few treats in the middle of the harness and let your dog eat them out of the middle.
Do 1 set of 5 repetitions, 2 or 3 times a day.
You can even put his harness around his dinner bowl at mealtime.
Put the harness out of sight when done.
When your dog looks excited to see the harness come out of its away place, try putting the harness on the ground with no treats in the middle to see if he’ll approach and sniff or touch the harness on his own. If he does → immediately praise and reward (reinforce): “Good boy” and treat.
Continue doing this for a few more days.
Ideally, you will not force the harness on him or chase him to put it on when you’re not acclimating and need to take him out. I suggest buying one harness for use and one for acclimation. Buy yellow or blue for acclimation — the two colors dogs can see.
🧩 Step 2: Take Baby Steps
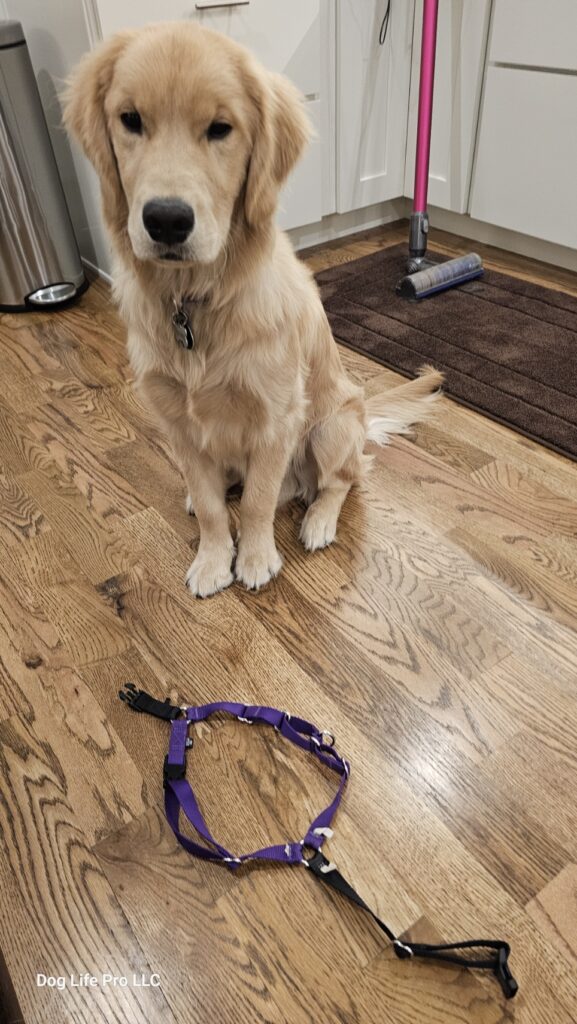
Reward small steps on the way to getting the harness on and snapped. Don’t get too excited and just go for it. Instead, just hold up the harness with one hand, hold a treat in the other and put it through the loop of the harness. My demonstration video is very condensed just to give you a visual of my description. Here’s a step-by-step of what you should actually do:
Do 2 or 3 sets per day, 5 repetitions each set, for each of steps below. Don’t forget to say “Good Boy” each repetition, right before your dog eats the reward (treat).
Feed your dog by putting the hand with the treat through the loop.
Now have your dog come take the treat from your hand while your hand is through the loop in the harness.
Repeat the above, but with your treat hand closer to you, so your dog has to put just his nose through the loop.
Now. move your treat hand even closer to you, so your dog has to put his face through the harness loop.
You’re almost there. Hold the treat so your dog has to put his whole head through the loop. This is where you want to be cautious not to rush. Do a few extra reps before you allow the harness to fall on your dog’s neck.
When you’re positive your dog shows little to no hesitation or anxiety putting his whole head through, gently place the harness on his neck. Immediately praise and reward and then quickly remove the harness.
If you made it to here, you’re rounding third base! Repeat the previous step, but leave the harness on your dog’s neck, and slowly go for snapping the buckle while you continue to praise him in a happy voice. If you get the harness buckle clipped, immediately start your walk.
This should be fun for your dog. If you look concerned, your dog will read your face. Smile and make a game out of it by sounding jolly.
🙅♂️ Step 3: Avoid Forced Handling (and Why It Matters)
This is the catch-22. You want to take it slow, not rush your dog, and allow her to acclimate to the harness at her own pace, but you also need to get her out for a walk. Ideally you have a fenced yard for relief, but if you have a puppy, you’re then missing out on socialization opportunities that the walk provides. My best advice is:
Plan ahead by getting your dog in a confined area, so you don’t end up in a game of chase throughout several rooms.
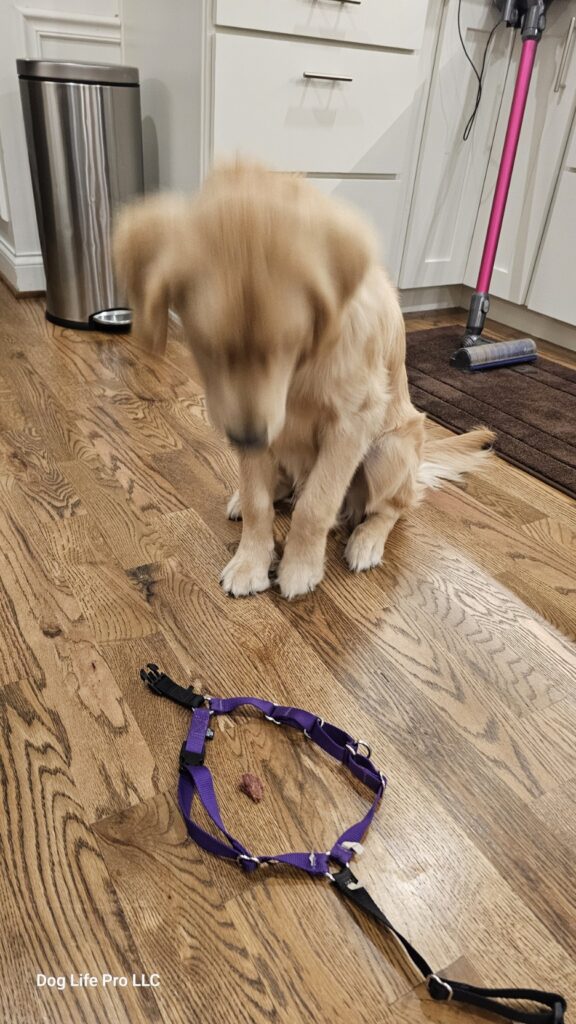
Even better, use some trickery, like stuffing the harness in between couch cushions, inviting your dog onto the couch, and then putting the harness on.
Approach your dog on your knees or sit on your butt and see if she’ll come to you with a food lure.
Remain calm and smile throughout. Laugh or talk to your dog in a sweet voice.
Be gentle when handling her.
Practice more than 2 or 3 sets each day if you have the time and try to keep the sessions short to accelerate progress.
Put your hand behind the buckle/clip, so you don’t accidentally pinch her and cause a huge setback.
At this point, if you’re still struggling, you should reach out for professional help by contacting a CCPDT-certified trainer.
🔁 Step 4: Add a Predictable Routine
Dogs thrive on structure, and a predictable routine helps to remove anxiety.
Try this simple sequence:
After you clip the harness, say, “walk time,” or any short word or phrase of your choice. Say it every time after snapping the clip and be ready to go out the door.
After some time, try saying the phrase as soon as the dog sees the harness. You should see excitement and a desire to begin the walk, which is a reward itself.
Once the pattern is consistent, the harness itself becomes a joy cue.
👀 Watch for Stress Signals During Training
You’ll know your dog is feeling overwhelmed if you see:
Lip licking when your dog hasn’t just eaten something
Yawning outside of sleepy times
Turning head away
Backing up
Freezing
Moving slowly
If you see any of these, go back one step and practice more. Try using extra special rewards like shrimp, salmon, or steak.
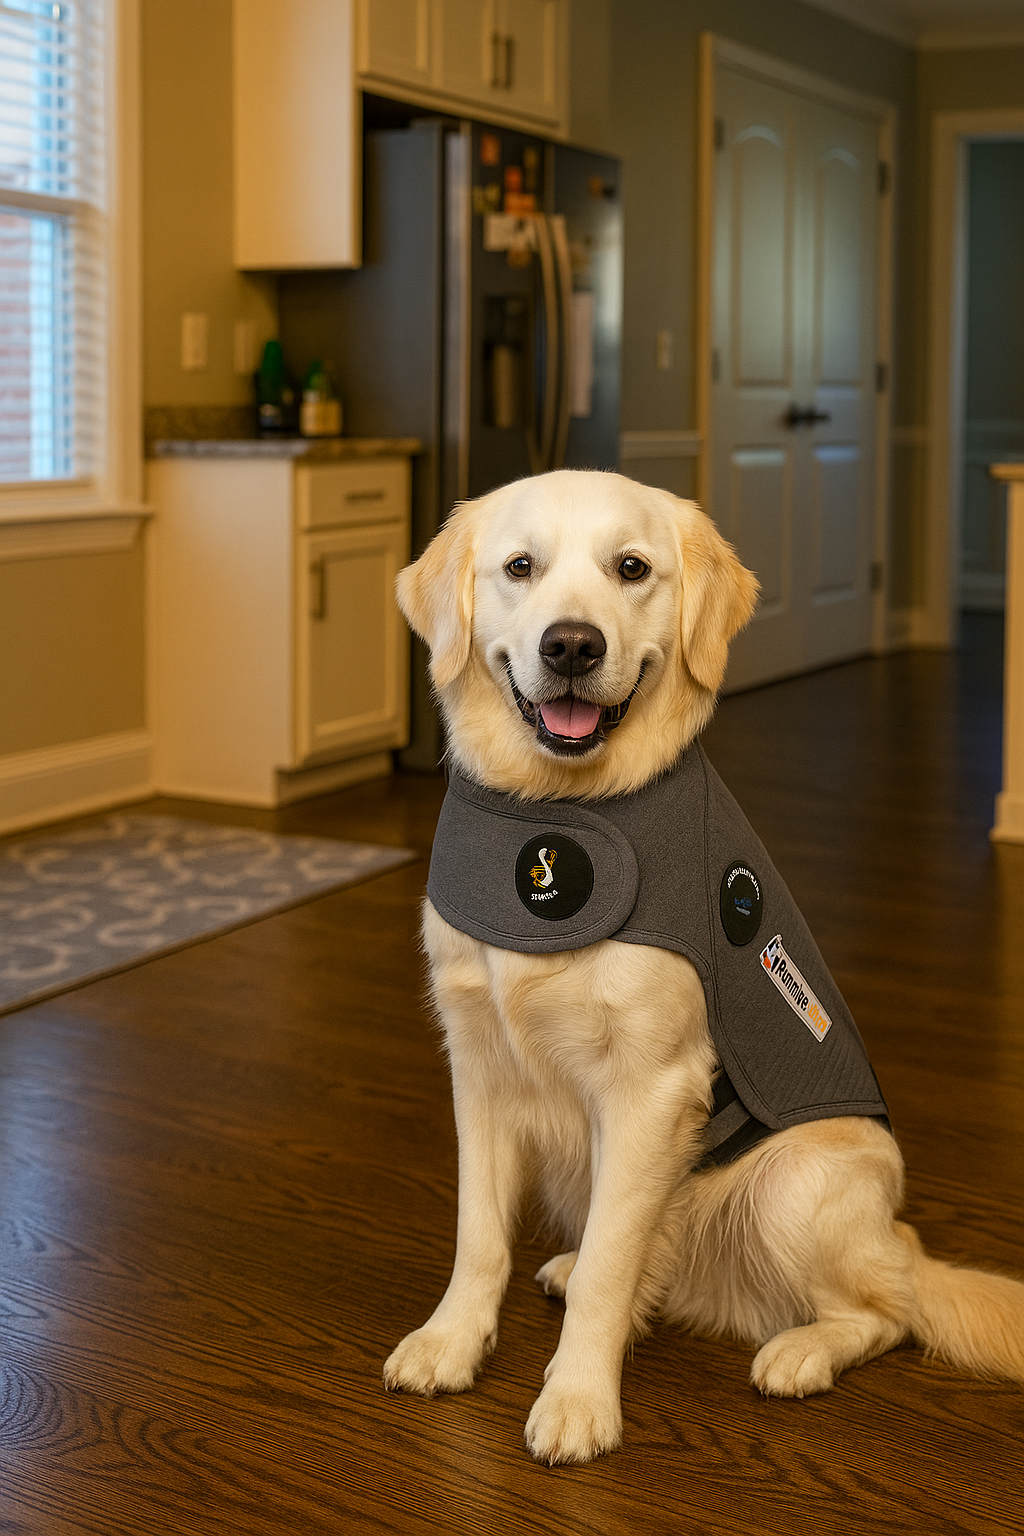
Use an EasyWalk harness. I can’t stress enough how many dogs this harness has helped. It doesn’t just thwart pulling on leash and give you more control — it also gives a dog a greater sense of freedom.
If your dog runs when he sees the harness, he’s not being stubborn — he’s communicating fear, uncertainty, or past discomfort.
With predictable cues, tiny steps, and reward-based shaping, your dog can learn that the harness predicts treats and walks.
Celebrate small wins and advance at your dog’s pace.
[mc4wp_form id="3110"]
If your dog backs away, hides, or runs the moment the harness comes out, you’re not alone. Many dogs develop anxiety around handling — especially when something goes over their head or tightens around their body.
The good news? With the right approach, any dog can learn to feel safe, relaxed, and even excited about their harness.
This guide explains why harness avoidance happens and shows you exactly how to fix it using reward-based acclimation and fear-free handling methods.
🎬 Why Dogs Become Afraid of Their Harness
Dogs can develop negative associations with harnesses for several reasons:
😵 Over-the-head fear — Many dogs dislike equipment moving near their face.
😣 Past discomfort — Putting the harness on without being gentle or accidentally pinching hair or skin in a buckle.
🚫 Rushing the process — Putting the harness on too quickly or forcefully.
🐶 Lack of early handling training — Common in rescues and under-socialized dogs.
These experiences can build up until “harness = danger,” causing your dog to avoid you with a harness — even if he loves walks.
🍗 Step 1: Build a Positive Association with the Harness
Your goal is simple: Harness appears → good things happen.
Place the harness on the floor.
Put a few treats in the middle of the harness and let your dog eat them out of the middle.
Do 1 set of 5 repetitions, 2 or 3 times a day.
You can even put his harness around his dinner bowl at mealtime.
Put the harness out of sight when done.
When your dog looks excited to see the harness come out of its away place, try putting the harness on the ground with no treats in the middle to see if he’ll approach and sniff or touch the harness on his own. If he does → immediately praise and reward (reinforce): “Good boy” and treat.
Continue doing this for a few more days.
Ideally, you will not force the harness on him or chase him to put it on when you’re not acclimating and need to take him out. I suggest buying one harness for use and one for acclimation. Buy yellow or blue for acclimation — the two colors dogs can see.
🧩 Step 2: Take Baby Steps
Reward small steps on the way to getting the harness on and snapped. Don’t get too excited and just go for it. Instead, just hold up the harness with one hand, hold a treat in the other and put it through the loop of the harness. My demonstration video is very condensed just to give you a visual of my description. Here’s a step-by-step of what you should actually do:
Do 2 or 3 sets per day, 5 repetitions each set, for each of steps below. Don’t forget to say “Good Boy” each repetition, right before your dog eats the reward (treat).
Feed your dog by putting the hand with the treat through the loop.
Now have your dog come take the treat from your hand while your hand is through the loop in the harness.
Repeat the above, but with your treat hand closer to you, so your dog has to put just his nose through the loop.
Now. move your treat hand even closer to you, so your dog has to put his face through the harness loop.
You’re almost there. Hold the treat so your dog has to put his whole head through the loop. This is where you want to be cautious not to rush. Do a few extra reps before you allow the harness to fall on your dog’s neck.
When you’re positive your dog shows little to no hesitation or anxiety putting his whole head through, gently place the harness on his neck. Immediately praise and reward and then quickly remove the harness.
If you made it to here, you’re rounding third base! Repeat the previous step, but leave the harness on your dog’s neck, and slowly go for snapping the buckle while you continue to praise him in a happy voice. If you get the harness buckle clipped, immediately start your walk.
This should be fun for your dog. If you look concerned, your dog will read your face. Smile and make a game out of it by sounding jolly.
🙅♂️ Step 3: Avoid Forced Handling (and Why It Matters)
This is the catch-22. You want to take it slow, not rush your dog, and allow her to acclimate to the harness at her own pace, but you also need to get her out for a walk. Ideally you have a fenced yard for relief, but if you have a puppy, you’re then missing out on socialization opportunities that the walk provides. My best advice is:
Plan ahead by getting your dog in a confined area, so you don’t end up in a game of chase throughout several rooms.
Even better, use some trickery, like stuffing the harness in between couch cushions, inviting your dog onto the couch, and then putting the harness on.
Approach your dog on your knees or sit on your butt and see if she’ll come to you with a food lure.
Remain calm and smile throughout. Laugh or talk to your dog in a sweet voice.
Be gentle when handling her.
Practice more than 2 or 3 sets each day if you have the time and try to keep the sessions short to accelerate progress.
Put your hand behind the buckle/clip, so you don’t accidentally pinch her and cause a huge setback.
At this point, if you’re still struggling, you should reach out for professional help by contacting a CCPDT-certified trainer.
🔁 Step 4: Add a Predictable Routine
Dogs thrive on structure, and a predictable routine helps to remove anxiety.
Try this simple sequence:
After you clip the harness, say, “walk time,” or any short word or phrase of your choice. Say it every time after snapping the clip and be ready to go out the door.
After some time, try saying the phrase as soon as the dog sees the harness. You should see excitement and a desire to begin the walk, which is a reward itself.
Once the pattern is consistent, the harness itself becomes a joy cue.
👀 Watch for Stress Signals During Training
You’ll know your dog is feeling overwhelmed if you see:
Lip licking when your dog hasn’t just eaten something
Yawning outside of sleepy times
Turning head away
Backing up
Freezing
Moving slowly
If you see any of these, go back one step and practice more. Try using extra special rewards like shrimp, salmon, or steak.
Use an EasyWalk harness. I can’t stress enough how many dogs this harness has helped. It doesn’t just thwart pulling on leash and give you more control — it also gives a dog a greater sense of freedom.
If your dog runs when he sees the harness, he’s not being stubborn — he’s communicating fear, uncertainty, or past discomfort.
With predictable cues, tiny steps, and reward-based shaping, your dog can learn that the harness predicts treats and walks.
Celebrate small wins and advance at your dog’s pace.
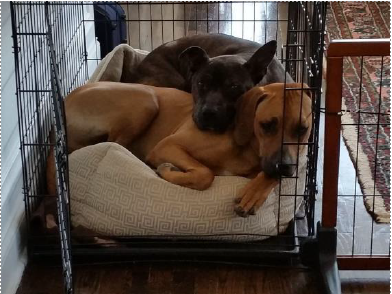
A properly introduced crate becomes your dog’s personal den — a place to relax, nap, or feel safe when life gets busy, during thunderstorms, fireworks, or the like.
Crate training isn’t about confinement — it’s about comfort, structure, and teaching independence.
Benefits of crate training include:
Safety: Prevents destructive behavior or injury when unsupervised during puppyhood.
Potty training: Dogs naturally avoid soiling where they sleep so the crate is essential when potty training.
Travel readiness: Makes vet visits, boarding, and car rides less stressful for some dogs.
Calm confidence: Helps dogs learn to settle and self-soothe.
When done right, your dog will view the crate as a peaceful retreat — not a punishment.
🐶 How to Help Your Dog Love Their Crate
Crate training works best when your dog learns that the crate means good things happen here. Follow these steps for success.
1. Pick the right location. At first, place the crate where you and your family spend most of your time — near a couch or your bed.
2. Make it cozy. Add blankets or pillows for comfort (and accept they may get chewed).
3. Add familiar scents and toys. Place a few safe toys inside. For puppies, use a Kong with a frozen treat to keep them happily occupied. Err on the side of too large to prevent it from becoming a choking hazard. They come in several sizes.
4. Feed in the crate. Serve meals and water in the crate to build positive associations.
5. Leave the door open. During the day, let your dog come and go freely — this helps them choose the crate on their own. If your dog shows anxiety near the crate, bungee the door open so they don’t panic if it accidentally closes on them.
6. Do some acclimation exercises. Sit on the floor a few feet away from the open crate and toss a treat into the crate so your dog has to go in to retrieve it. Repeat. If your dog won’t go in to get it, toss the treat just outside of the crate and then slowly further into the crate as you see your dog’s comfort level increase.
7. Don’t rush it! Rushing will set back progress. Some dogs take quickly; others take time. Move at your dog’s pace.
👉 This early phase is called crate acclimation. It can take days or weeks, depending on your dog’s temperament.
⏳ The Crate Training Conundrum
Here’s the challenge: you need the crate for potty training, but you’re still teaching your dog to enjoy it. The key is balance — structure without rushing.
Expect some whining and barking at first. Stay patient and consistent.
When not in the crate, give your dog plenty of physical exercise and mental enrichment (foraging mats, treat puzzles, play with other puppies).
Ensure all needs are met before crating — potty, food, play, affection, and a clean bill of health.
Never open the cratedoor while your dog is whining or barking. Doing so teaches that noise gets results — and the behavior will persist.
The process takes time, but the science shows it works.
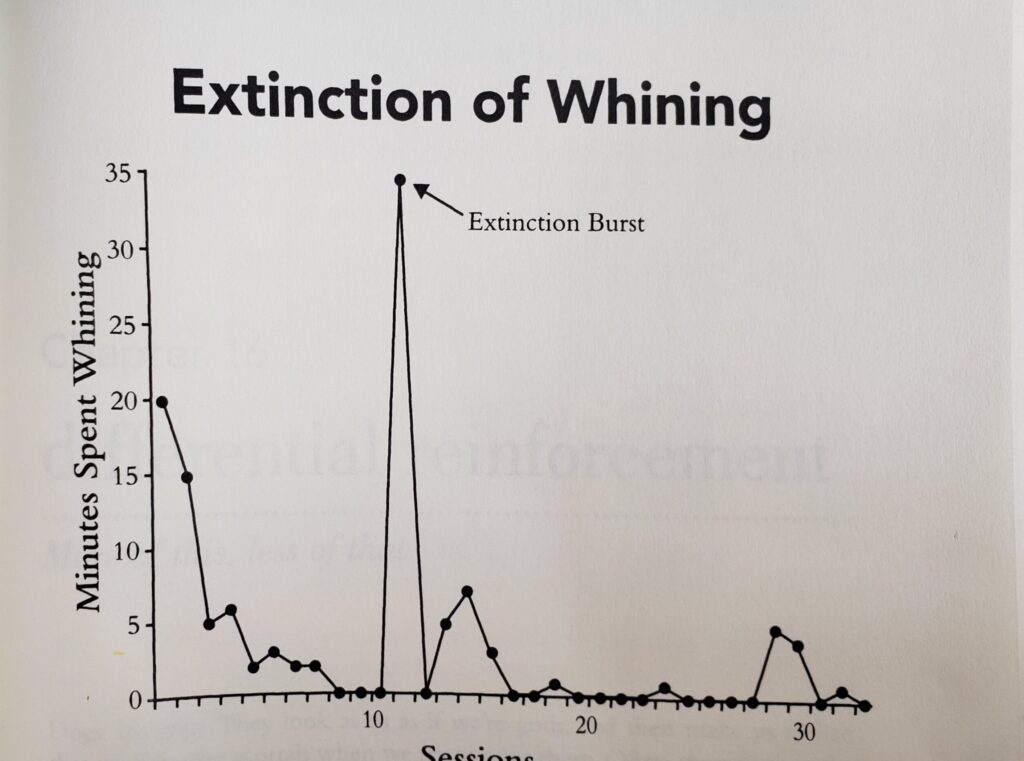
According to How Dogs Learn by Mary R. Birch Ph.D. and Jon S. Bailey Ph.D., most dogs stop whining and barking within 30 days, I’ve often seen sooner. Their extinction chart shows a short “extinction burst” (a temporary increase in barking on day 11) before behavior drops off completely — a normal part of learning.
💤 A Peaceful Place They’ll Choose on Their Own
When crate training is done properly, your dog will go into their crate voluntarily after play or meals — because it feels safe and familiar. It becomes their den, their bedroom, their space.
Crates are not cages — they’re comfort zones that promote calmness, structure, and emotional security.
If you ever feel discouraged during the process, remember: your goal isn’t to “lock up” your dog, it’s to give them a place where they can rest, reset, and relax.
A properly introduced crate becomes your dog’s personal den — a place to relax, nap, or feel safe when life gets busy, during thunderstorms, fireworks, or the like.
Crate training isn’t about confinement — it’s about comfort, structure, and teaching independence.
Benefits of crate training include:
Safety: Prevents destructive behavior or injury when unsupervised during puppyhood.
Potty training: Dogs naturally avoid soiling where they sleep so the crate is essential when potty training.
Travel readiness: Makes vet visits, boarding, and car rides less stressful for some dogs.
Calm confidence: Helps dogs learn to settle and self-soothe.
When done right, your dog will view the crate as a peaceful retreat — not a punishment.
🐶 How to Help Your Dog Love Their Crate
Crate training works best when your dog learns that the crate means good things happen here. Follow these steps for success.
1. Pick the right location. At first, place the crate where you and your family spend most of your time — near a couch or your bed.
2. Make it cozy. Add blankets or pillows for comfort (and accept they may get chewed).
3. Add familiar scents and toys. Place a few safe toys inside. For puppies, use a Kong with a frozen treat to keep them happily occupied. Err on the side of too large to prevent it from becoming a choking hazard. They come in several sizes.
4. Feed in the crate. Serve meals and water in the crate to build positive associations.
5. Leave the door open. During the day, let your dog come and go freely — this helps them choose the crate on their own. If your dog shows anxiety near the crate, bungee the door open so they don’t panic if it accidentally closes on them.
6. Do some acclimation exercises. Sit on the floor a few feet away from the open crate and toss a treat into the crate so your dog has to go in to retrieve it. Repeat. If your dog won’t go in to get it, toss the treat just outside of the crate and then slowly further into the crate as you see your dog’s comfort level increase.
7. Don’t rush it! Rushing will set back progress. Some dogs take quickly; others take time. Move at your dog’s pace.
👉 This early phase is called crate acclimation. It can take days or weeks, depending on your dog’s temperament.
⏳ The Crate Training Conundrum
Here’s the challenge: you need the crate for potty training, but you’re still teaching your dog to enjoy it. The key is balance — structure without rushing.
Expect some whining and barking at first. Stay patient and consistent.
When not in the crate, give your dog plenty of physical exercise and mental enrichment (foraging mats, treat puzzles, play with other puppies).
Ensure all needs are met before crating — potty, food, play, affection, and a clean bill of health.
Never open the cratedoor while your dog is whining or barking. Doing so teaches that noise gets results — and the behavior will persist.
The process takes time, but the science shows it works.
According to How Dogs Learn by Mary R. Birch Ph.D. and Jon S. Bailey Ph.D., most dogs stop whining and barking within 30 days, I’ve often seen sooner. Their extinction chart shows a short “extinction burst” (a temporary increase in barking on day 11) before behavior drops off completely — a normal part of learning.
💤 A Peaceful Place They’ll Choose on Their Own
When crate training is done properly, your dog will go into their crate voluntarily after play or meals — because it feels safe and familiar. It becomes their den, their bedroom, their space.
Crates are not cages — they’re comfort zones that promote calmness, structure, and emotional security.
If you ever feel discouraged during the process, remember: your goal isn’t to “lock up” your dog, it’s to give them a place where they can rest, reset, and relax.
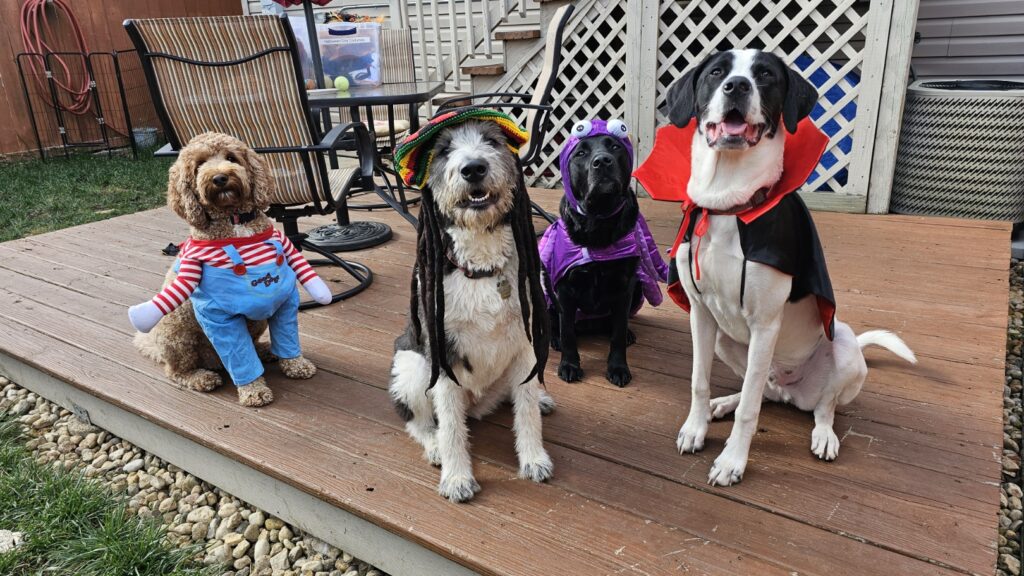
What would Halloween be like if we didn’t include our dogs?! We always dress up some of our daycare dogs. Costumes can be a great way to involve your dog in the season’s festivities (as long as they’re comfortable and happy wearing them). Not all really like wearing a costume and of course, we don’t force them, but if they’ll do it for treats, they’re included in the fun.
Here are a few of our Dog Life Pro favorites getting into the Halloween spirit!
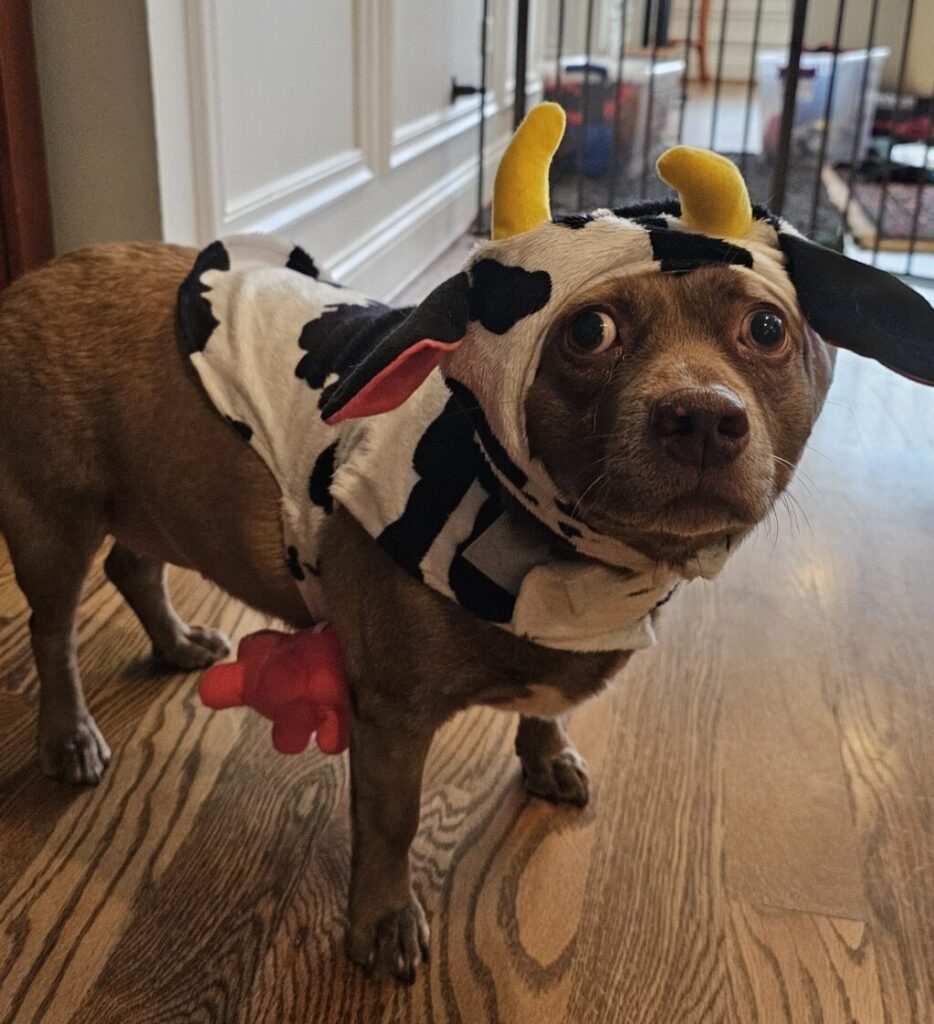
🐮 Bambi the Cow
Meet Bambi, our adorable pittie mix with her cow costume complete with horns, tail and udder.
Spotted pittie cow Bambi
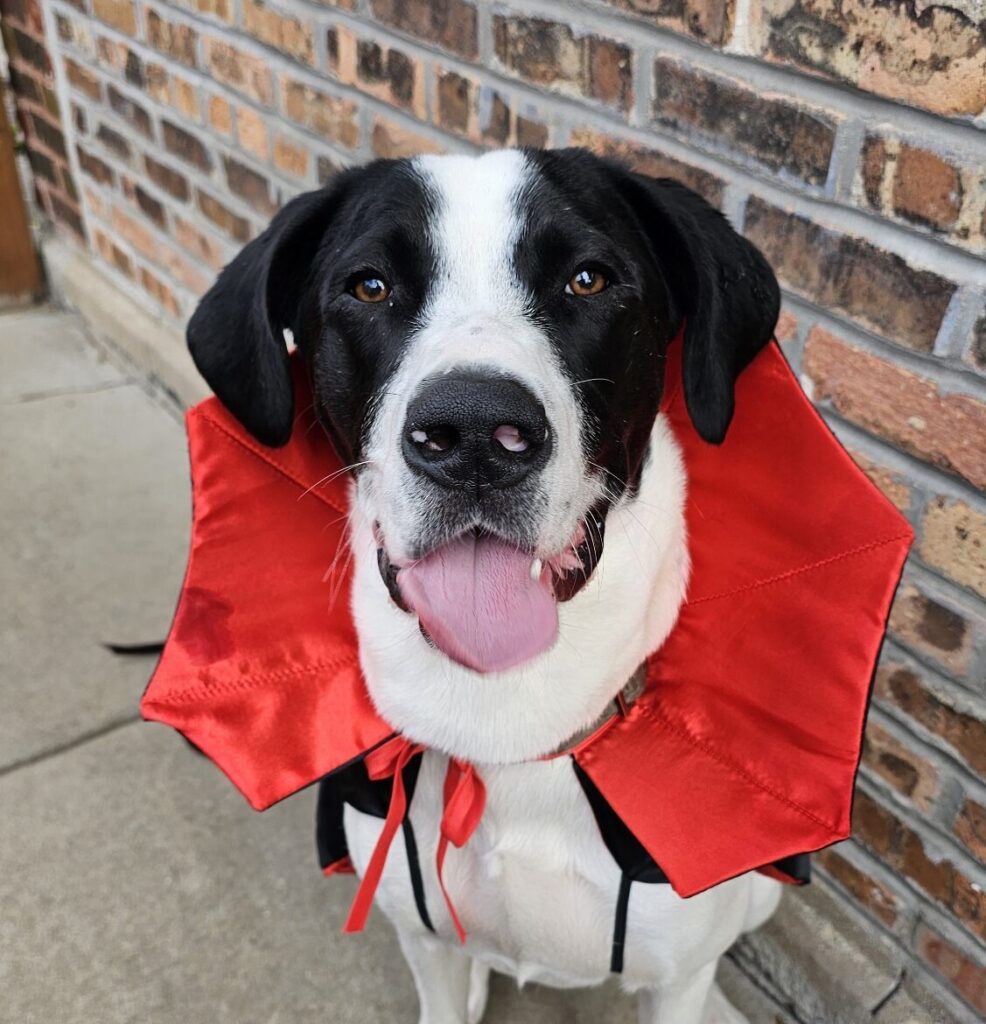
🧛♂️ Bear the Vampire
Bear doesn’t exactly look scary in his vampire costume. He’s more of an adorable vampire if there’s such a thing.
Not scary vampire Bear
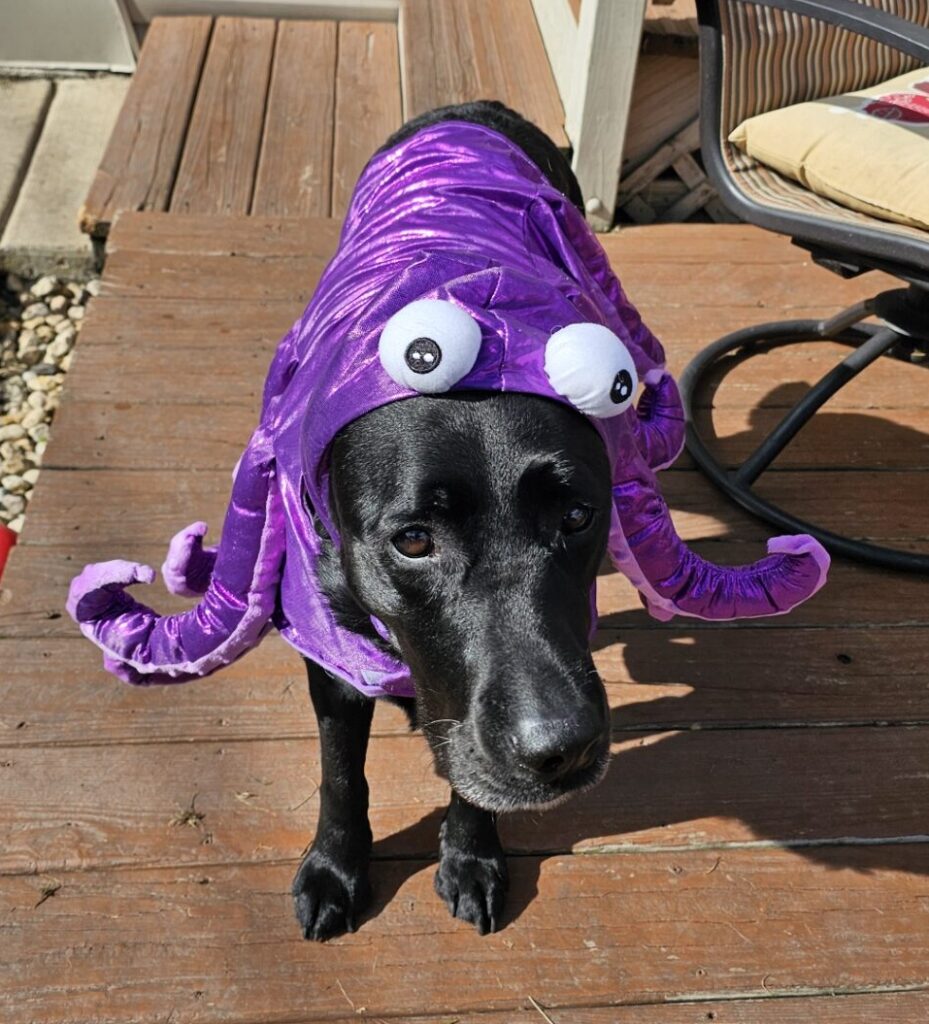
🐙 Dolly the Purple Octopus
No one rocks eight legs quite like Dolly in her octopus costume! And she’s totally unique, because this costume is no longer available. Here’s one you might like instead.
Curlee could be scary, but the cuteness shows through.
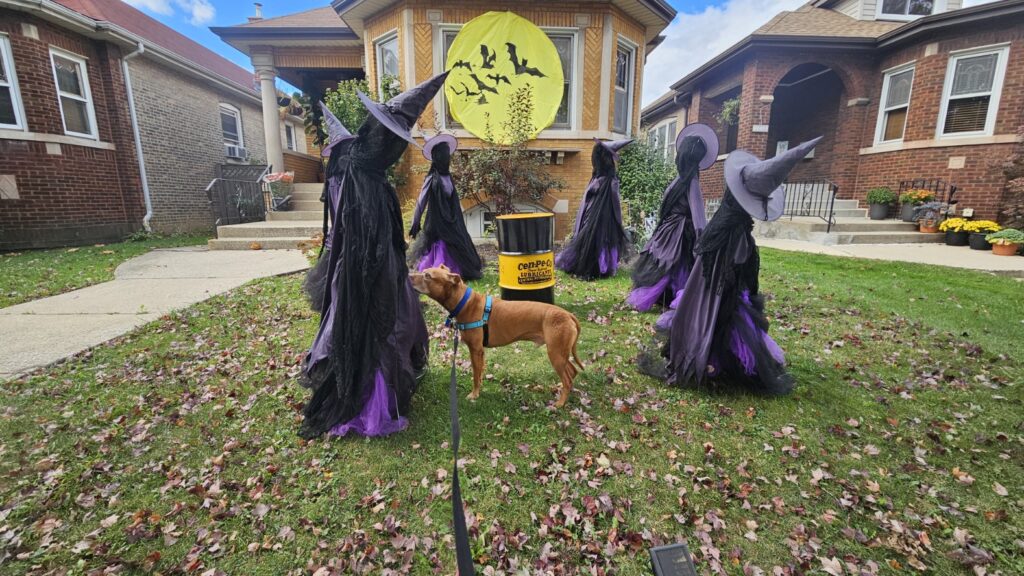
🧙♀️ Kobe and the Coven
Kobe stumbled upon a spooky witch circle and handled it like a champ. He was actually thinking they had treats for him.
Kobe thought spells meant treats
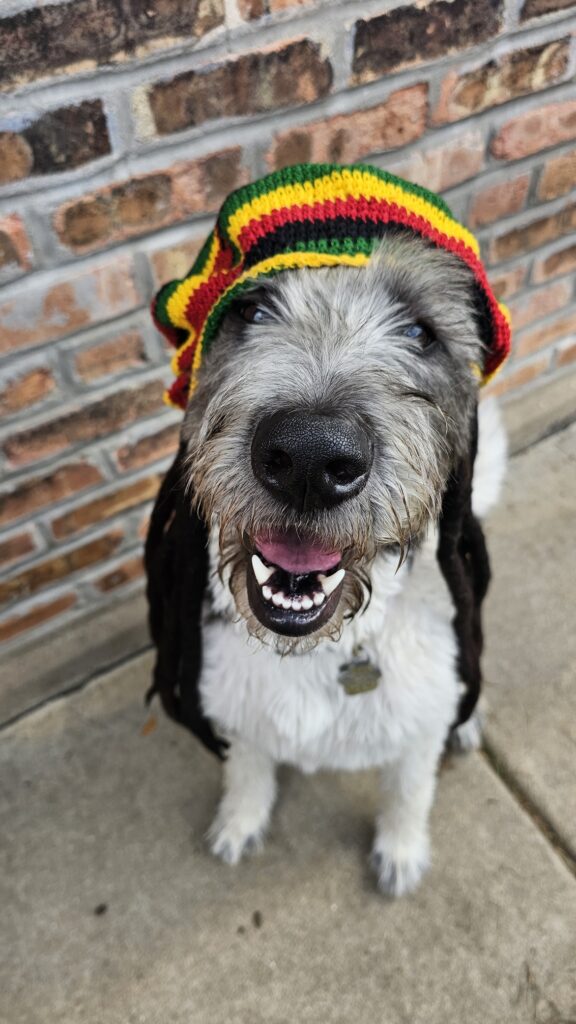
🌿 Paulie the Rasta Pup
I think Paulie’s costume was the most fitting. She just looks the part somehow. This hat and dreadlocks was actually part of my costume from a few years back.
Her favorite reggae is Stick Figure, after Bob Marley of course.
🐾 Remembering Bear
We lost Bear this year. He was a sweet boy and one of our first dogs when I started Dog Life Pro. I think of him often.
👏 Wishing You and Your Pup a Happy and Safe Halloween – So Much Better Than the 4th of July!
[mc4wp_form id="3110"]
👻 Halloween Fun with Our Four-Legged Friends
What would Halloween be like if we didn’t include our dogs?! We always dress up some of our daycare dogs. Costumes can be a great way to involve your dog in the season’s festivities (as long as they’re comfortable and happy wearing them). Not all really like wearing a costume and of course, we don’t force them, but if they’ll do it for treats, they’re included in the fun.
Here are a few of our Dog Life Pro favorites getting into the Halloween spirit!
🐮 Bambi the Cow
Meet Bambi, our adorable pittie mix with her cow costume complete with horns, tail and udder.
Spotted pittie cow Bambi
🧛♂️ Bear the Vampire
Bear doesn’t exactly look scary in his vampire costume. He’s more of an adorable vampire if there’s such a thing.
Not scary vampire Bear
🐙 Dolly the Purple Octopus
No one rocks eight legs quite like Dolly in her octopus costume! And she’s totally unique, because this costume is no longer available. Here’s one you might like instead.
Curlee could be scary, but the cuteness shows through.
🧙♀️ Kobe and the Coven
Kobe stumbled upon a spooky witch circle and handled it like a champ. He was actually thinking they had treats for him.
Kobe thought spells meant treats
🌿 Paulie the Rasta Pup
I think Paulie’s costume was the most fitting. She just looks the part somehow. This hat and dreadlocks was actually part of my costume from a few years back.
Her favorite reggae is Stick Figure, after Bob Marley of course.
🐾 Remembering Bear
We lost Bear this year. He was a sweet boy and one of our first dogs when I started Dog Life Pro. I think of him often.
👏 Wishing You and Your Pup a Happy and Safe Halloween – So Much Better Than the 4th of July!
Splitting is a subtle but powerful calming signal first described by Norwegian trainer Turid Rugaas in her book Barking: The Sound of a Language. It’s a behavior dogs use to diffuse tension, prevent conflict, and reassure others.
For example, when two dogs appear on edge, a third might walk between them, turn sideways, or look away. This quiet movement acts as a natural signal that says, “Hey, let’s keep things calm.”
Dogs also “split” their humans—like stepping between you and another dog or person—when they sense tension or excitement. It’s not dominance; it’s communication.
Check out this great video showing a Boston Terrier splitting two other dogs. The split comes right at the end of the video.
💬 Why Humans Should Learn to Split
We can use splitting to communicate to our dogs that we’ve got the situation handled. It’s especially useful for dogs who are anxious or dogs that bark at:
The front door
Passersby out the window
People or dogs on walks
When you “split” your dog, you’re saying in their language:
“Hey, I’ve got this. No need to keep warning me with a warning bark.”
This simple acknowledgment relieves your dog’s anxiety and frustration and reduces barking because they feel heard.
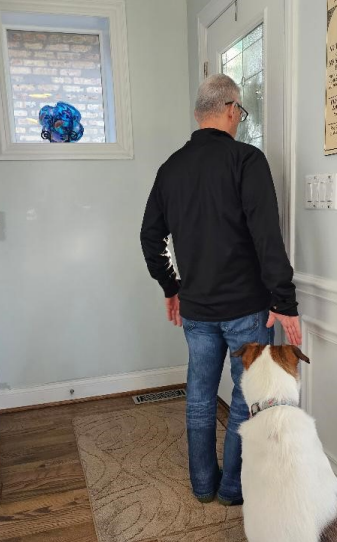
🚪 How to Practice Splitting at the Door
It’s easiest to start at your front door—ideally with the door open and a closed storm door so your dog can see outside. Doors offer a narrow field of view that makes it easier for you to stay between your dog and whatever stimulus has them anxious.
Once your dog understands at the door, you can generalize the behavior to windows or fences, which usually cover a wider visual field and may be harder at first.
🧍 The Keys to Effective Splitting
The essence of splitting is calm, quiet body language. When you use it, remember:
No talking
No touching
No direct eye contact
Simply walk between your dog and the trigger. Pause. If you’re still in the early stages, you will need to physically get up and walk into your dog’s space to “split.”
Look in the direction of the trigger or stimulus for a few seconds, then turn away, say “Good boy”, and walk away, inviting them to follow you. (See [Follow Me training link])
Alternatively, you can walk past your dog, turn, and cue a hand target. (See [Hand Target link]).
With consistent practice, many dogs will eventually respond just to their name and a hand cue—no need to get up at all.
🚶 Using Splitting on Walks
Once your dog recognizes the cue, you can use splitting during walks whenever your dog becomes alert or anxious about someone approaching, a loud truck or another dog,
Place yourself between your dog and the source of your dog’s anxiety.
Simultaneously, create distance for your dog by arcing away from the object.
Remain calm. Fake it if you have to. A dog can notice a one-centimeter change in the width of your lips.
Do not tighten up on the leash. This tells your dog, “You should be anxious.”
Do it right and you’re telling your dog, “Thanks for the warning. I’ve got the situation under control.”
🧠 Why Splitting Works
Splitting reduces frustration, uncertainty, and arousal. Your dog barks because they feel responsible for alerting you. Once they see you respond, their job is done.
By using splitting, you help your dog feel safe, understood, and heard—which builds trust and strengthens your bond.
💡 Final Thoughts
Splitting is one of the most underused communication tools in dog training. It’s quiet, intuitive, and deeply respectful of how dogs naturally navigate social tension.
Once you’ve practiced it at home and on walks, you may begin to notice your dog looking at you for direction instead of becoming anxious — not because you “trained” it, but because you finally spoke their language.
Here’s a document I created on Splitting that will give you a bit more detail, and here’s a link to Turid’s book, Barking: The Sound of a Language. It’s an excellent, very short read that will also educate you about the other 8 types of barks she has identified.
[mc4wp_form id="3110"]
🐶 What Is “Splitting” in Dogs?
Splitting is a subtle but powerful calming signal first described by Norwegian trainer Turid Rugaas in her book Barking: The Sound of a Language. It’s a behavior dogs use to diffuse tension, prevent conflict, and reassure others.
For example, when two dogs appear on edge, a third might walk between them, turn sideways, or look away. This quiet movement acts as a natural signal that says, “Hey, let’s keep things calm.”
Dogs also “split” their humans—like stepping between you and another dog or person—when they sense tension or excitement. It’s not dominance; it’s communication.
Check out this great video showing a Boston Terrier splitting two other dogs. The split comes right at the end of the video.
💬 Why Humans Should Learn to Split
We can use splitting to communicate to our dogs that we’ve got the situation handled. It’s especially useful for dogs who are anxious or dogs that bark at:
The front door
Passersby out the window
People or dogs on walks
When you “split” your dog, you’re saying in their language:
“Hey, I’ve got this. No need to keep warning me with a warning bark.”
This simple acknowledgment relieves your dog’s anxiety and frustration and reduces barking because they feel heard.
🚪 How to Practice Splitting at the Door
It’s easiest to start at your front door—ideally with the door open and a closed storm door so your dog can see outside. Doors offer a narrow field of view that makes it easier for you to stay between your dog and whatever stimulus has them anxious.
Once your dog understands at the door, you can generalize the behavior to windows or fences, which usually cover a wider visual field and may be harder at first.
🧍 The Keys to Effective Splitting
The essence of splitting is calm, quiet body language. When you use it, remember:
No talking
No touching
No direct eye contact
Simply walk between your dog and the trigger. Pause. If you’re still in the early stages, you will need to physically get up and walk into your dog’s space to “split.”
Look in the direction of the trigger or stimulus for a few seconds, then turn away, say “Good boy”, and walk away, inviting them to follow you. (See [Follow Me training link])
Alternatively, you can walk past your dog, turn, and cue a hand target. (See [Hand Target link]).
With consistent practice, many dogs will eventually respond just to their name and a hand cue—no need to get up at all.
🚶 Using Splitting on Walks
Once your dog recognizes the cue, you can use splitting during walks whenever your dog becomes alert or anxious about someone approaching, a loud truck or another dog,
Place yourself between your dog and the source of your dog’s anxiety.
Simultaneously, create distance for your dog by arcing away from the object.
Remain calm. Fake it if you have to. A dog can notice a one-centimeter change in the width of your lips.
Do not tighten up on the leash. This tells your dog, “You should be anxious.”
Do it right and you’re telling your dog, “Thanks for the warning. I’ve got the situation under control.”
🧠 Why Splitting Works
Splitting reduces frustration, uncertainty, and arousal. Your dog barks because they feel responsible for alerting you. Once they see you respond, their job is done.
By using splitting, you help your dog feel safe, understood, and heard—which builds trust and strengthens your bond.
💡 Final Thoughts
Splitting is one of the most underused communication tools in dog training. It’s quiet, intuitive, and deeply respectful of how dogs naturally navigate social tension.
Once you’ve practiced it at home and on walks, you may begin to notice your dog looking at you for direction instead of becoming anxious — not because you “trained” it, but because you finally spoke their language.
Here’s a document I created on Splitting that will give you a bit more detail, and here’s a link to Turid’s book, Barking: The Sound of a Language. It’s an excellent, very short read that will also educate you about the other 8 types of barks she has identified.
If you’ve ever opened a container of Greek yogurt around your dog, chances are they came running. Most dogs love the taste of Greek yogurt, and the good news is that plain, unsweetened, non-fat Greek yogurt can be a healthy occasional treat.
But is it really safe? In this post, we’ll explore the benefits, risks, feeding tips, and scientific evidence so you can share Greek yogurt with your pup responsibly.
✅ Benefits of Greek Yogurt for Dogs
Dogs Love It Many dogs eagerly lap up Greek yogurt, making it a great way to sneak in extra nutrients or to entice picky eaters.
High in Protein Greek yogurt is packed with high-quality protein to support strong muscles and energy.
Rich in Calcium Calcium strengthens bones, teeth, and nerve health. A spoonful of yogurt can give your dog’s diet a healthy boost.
Probiotics for Gut Health Many Greek yogurts contain live cultures like Lactobacillus acidophilus, which may help balance gut bacteria and support digestion.
Lower in Lactose Because Greek yogurt is strained, it contains less lactose than regular yogurt — making it easier for many dogs to tolerate.
📚 What the Research & Experts Say
While there are not many large trials looking at Greek yogurt specifically, several veterinary nutrition resources and studies confirm the nutritional and probiotic benefits of plain yogurt for dogs:
A 2023 review on Probiotics and Gut Health in Dogs & Cats concluded that probiotic supplementation (like the live cultures found in yogurt) supports healthy gut microbiota, improves digestion, and can help manage gastrointestinal disorders.
The American Kennel Club notes that plain Greek yogurt is high in protein and calcium, and its live cultures may aid digestion — though it emphasizes avoiding flavored or sweetened yogurts.
A 2023 article on Functional Foods for Canine Well-Being highlights that functional foods containing probiotics improve gastrointestinal health and immune function in dogs.
Together, this evidence suggests that plain Greek yogurt can be a safe, nutritious addition to your dog’s diet when offered in moderation.
⚠️ Risks and Considerations
Avoid Artificial Sweeteners: Yogurt containing xylitol is toxic to dogs. Stick to plain, unsweetened varieties.
Digestive Upset Possible: Even with less lactose, some dogs may still get gas, bloating, or diarrhea if they eat too much.
Not for Every Dog: Dogs with pancreatitis, IBD, or severe lactose intolerance should skip yogurt.
📏 How Much Greek Yogurt Can Dogs Have?
Portion size: About 1 teaspoon per 10 lbs of body weight is a safe starting point.
Frequency: A few times per week as a treat, not an everyday staple.
Best choice: Plain, unsweetened, non-fat Greek yogurt with live cultures.
🐕 Fun Ways to Serve Greek Yogurt
Meal Topper: Mix a spoonful into kibble for added nutrition.
Training Reward: Offer small amounts as a high-value treat.
Frozen Treats: Freeze yogurt in silicone molds for a cooling summer snack.
🐾 Final Takeaway
Dogs love Greek yogurt — and the good news is that plain, non-fat Greek yogurt is safe and healthy for most dogs in moderation. It provides protein, calcium, and probiotics, but it should only be an occasional treat, not a diet staple. Always start small and watch for digestive upset.
Dolly and Bear LOVE their Greek yogurt!
[mc4wp_form id="3110"]
🐶 Introduction
If you’ve ever opened a container of Greek yogurt around your dog, chances are they came running. Most dogs love the taste of Greek yogurt, and the good news is that plain, unsweetened, non-fat Greek yogurt can be a healthy occasional treat.
But is it really safe? In this post, we’ll explore the benefits, risks, feeding tips, and scientific evidence so you can share Greek yogurt with your pup responsibly.
✅ Benefits of Greek Yogurt for Dogs
Dogs Love It Many dogs eagerly lap up Greek yogurt, making it a great way to sneak in extra nutrients or to entice picky eaters.
High in Protein Greek yogurt is packed with high-quality protein to support strong muscles and energy.
Rich in Calcium Calcium strengthens bones, teeth, and nerve health. A spoonful of yogurt can give your dog’s diet a healthy boost.
Probiotics for Gut Health Many Greek yogurts contain live cultures like Lactobacillus acidophilus, which may help balance gut bacteria and support digestion.
Lower in Lactose Because Greek yogurt is strained, it contains less lactose than regular yogurt — making it easier for many dogs to tolerate.
📚 What the Research & Experts Say
While there are not many large trials looking at Greek yogurt specifically, several veterinary nutrition resources and studies confirm the nutritional and probiotic benefits of plain yogurt for dogs:
A 2023 review on Probiotics and Gut Health in Dogs & Cats concluded that probiotic supplementation (like the live cultures found in yogurt) supports healthy gut microbiota, improves digestion, and can help manage gastrointestinal disorders.
The American Kennel Club notes that plain Greek yogurt is high in protein and calcium, and its live cultures may aid digestion — though it emphasizes avoiding flavored or sweetened yogurts.
A 2023 article on Functional Foods for Canine Well-Being highlights that functional foods containing probiotics improve gastrointestinal health and immune function in dogs.
Together, this evidence suggests that plain Greek yogurt can be a safe, nutritious addition to your dog’s diet when offered in moderation.
⚠️ Risks and Considerations
Avoid Artificial Sweeteners: Yogurt containing xylitol is toxic to dogs. Stick to plain, unsweetened varieties.
Digestive Upset Possible: Even with less lactose, some dogs may still get gas, bloating, or diarrhea if they eat too much.
Not for Every Dog: Dogs with pancreatitis, IBD, or severe lactose intolerance should skip yogurt.
📏 How Much Greek Yogurt Can Dogs Have?
Portion size: About 1 teaspoon per 10 lbs of body weight is a safe starting point.
Frequency: A few times per week as a treat, not an everyday staple.
Best choice: Plain, unsweetened, non-fat Greek yogurt with live cultures.
🐕 Fun Ways to Serve Greek Yogurt
Meal Topper: Mix a spoonful into kibble for added nutrition.
Training Reward: Offer small amounts as a high-value treat.
Frozen Treats: Freeze yogurt in silicone molds for a cooling summer snack.
🐾 Final Takeaway
Dogs love Greek yogurt — and the good news is that plain, non-fat Greek yogurt is safe and healthy for most dogs in moderation. It provides protein, calcium, and probiotics, but it should only be an occasional treat, not a diet staple. Always start small and watch for digestive upset.
Thunderstorms and fireworks are more than just loud noises for many dogs — they can trigger fear, anxiety, and panic. One popular solution is the ThunderShirt, a snug-fitting vest designed to calm dogs by applying gentle, constant pressure, similar to swaddling a baby.
But do they actually work? Let’s look at the latest 2025 research — and be clear: ThunderShirts are not a guaranteed cure, but they may help some dogs as part of a broader approach.
📊 What the Research Says
Systematic Review (2024) A major review of 229 studies found only a handful that met strict criteria. Results suggested limited evidence that pressure wraps reduce anxiety, but importantly, no harmful effects were reported. MDPI Review, 2024
Preliminary Home Case Data (2025) New reports show dogs with thunderstorm phobia in real homes appeared calmer when wearing wraps — suggesting benefits beyond lab tests. Early data, but promising. CABI Digital Library, 2025
Mixed Older Studies Some studies found lower heart rate and less pacing in wrapped dogs. Others saw little change in stress hormones like cortisol. Effects tend to be modest, not dramatic.
❓ What We Still Don’t Know
Which dogs benefit most (breed, temperament, severity of fear).
Whether the effect lasts across repeated storms.
How early to put the vest on before a storm.
Whether tightness, brand, or fit makes a big difference.
How well wraps work alongside training or medication.
⚖️ ThunderShirts vs Other Calming Tools
ThunderShirts aren’t the only option. Here’s how they stack up:
Pheromone Diffusers (e.g., Adaptil) Release calming dog-appeasing pheromones. Safe and often helpful, but effects vary widely. Some dogs don’t respond at all.
Supplements (e.g., L-theanine, melatonin, CBD blends) Can reduce anxiety in mild cases, but results are inconsistent and quality control varies by brand. Always ask your vet before use.
Prescription Medications (e.g., Sileo, fluoxetine, alprazolam) Most effective for severe phobias, but require vet involvement, and potential side effects exist.
Behavioral Training (Desensitization & Counterconditioning) Gold standard for long-term improvement. Slowly exposes dogs to thunder sounds in a safe way while pairing them with positive experiences. Takes time and consistency, but most effective when done right.
Takeaway: A ThunderShirt is low-risk and affordable, but it’s rarely enough by itself. Think of it as one tool in a toolbox — often most helpful when combined with training or other supports.
✅ Practical Tips if You Try a ThunderShirt
Fit matters: Snug but not restrictive. Too loose = ineffective. Too tight = uncomfortable.
Start early: Put it on before the storm hits, not during peak panic.
Pair with calm routines: Safe space, white noise, calming music, or a chew toy.
Observe your dog: If you see no change after a few storms, consider combining with other methods.
📝 FAQ
Is there any downside? Not really. Poor fit can cause discomfort, but studies haven’t shown harmful effects.
Can it replace medication? Usually not. For severe cases, meds or training may be needed. A ThunderShirt can be a supplement, not a replacement.
How much does it cost? Generally around $40–$50 — much cheaper than many ongoing treatments.
🐕 Final Takeaway
Personally, I have heard both positive and negative feedback from my clients that have tried the ThunderShirts. The bottom line is that ThunderShirtsmight help some dogs feel calmer during storms or fireworks. The science shows modest benefits, not miracles. Still, given their low cost, safety, and ease of use, they’re worth trying as one part of a broader anxiety plan.
[mc4wp_form id="3110"]
🐾 Introduction
Thunderstorms and fireworks are more than just loud noises for many dogs — they can trigger fear, anxiety, and panic. One popular solution is the ThunderShirt, a snug-fitting vest designed to calm dogs by applying gentle, constant pressure, similar to swaddling a baby.
But do they actually work? Let’s look at the latest 2025 research — and be clear: ThunderShirts are not a guaranteed cure, but they may help some dogs as part of a broader approach.
📊 What the Research Says
Systematic Review (2024) A major review of 229 studies found only a handful that met strict criteria. Results suggested limited evidence that pressure wraps reduce anxiety, but importantly, no harmful effects were reported. MDPI Review, 2024
Preliminary Home Case Data (2025) New reports show dogs with thunderstorm phobia in real homes appeared calmer when wearing wraps — suggesting benefits beyond lab tests. Early data, but promising. CABI Digital Library, 2025
Mixed Older Studies Some studies found lower heart rate and less pacing in wrapped dogs. Others saw little change in stress hormones like cortisol. Effects tend to be modest, not dramatic.
❓ What We Still Don’t Know
Which dogs benefit most (breed, temperament, severity of fear).
Whether the effect lasts across repeated storms.
How early to put the vest on before a storm.
Whether tightness, brand, or fit makes a big difference.
How well wraps work alongside training or medication.
⚖️ ThunderShirts vs Other Calming Tools
ThunderShirts aren’t the only option. Here’s how they stack up:
Pheromone Diffusers (e.g., Adaptil) Release calming dog-appeasing pheromones. Safe and often helpful, but effects vary widely. Some dogs don’t respond at all.
Supplements (e.g., L-theanine, melatonin, CBD blends) Can reduce anxiety in mild cases, but results are inconsistent and quality control varies by brand. Always ask your vet before use.
Prescription Medications (e.g., Sileo, fluoxetine, alprazolam) Most effective for severe phobias, but require vet involvement, and potential side effects exist.
Behavioral Training (Desensitization & Counterconditioning) Gold standard for long-term improvement. Slowly exposes dogs to thunder sounds in a safe way while pairing them with positive experiences. Takes time and consistency, but most effective when done right.
Takeaway: A ThunderShirt is low-risk and affordable, but it’s rarely enough by itself. Think of it as one tool in a toolbox — often most helpful when combined with training or other supports.
✅ Practical Tips if You Try a ThunderShirt
Fit matters: Snug but not restrictive. Too loose = ineffective. Too tight = uncomfortable.
Start early: Put it on before the storm hits, not during peak panic.
Pair with calm routines: Safe space, white noise, calming music, or a chew toy.
Observe your dog: If you see no change after a few storms, consider combining with other methods.
📝 FAQ
Is there any downside? Not really. Poor fit can cause discomfort, but studies haven’t shown harmful effects.
Can it replace medication? Usually not. For severe cases, meds or training may be needed. A ThunderShirt can be a supplement, not a replacement.
How much does it cost? Generally around $40–$50 — much cheaper than many ongoing treatments.
🐕 Final Takeaway
Personally, I have heard both positive and negative feedback from my clients that have tried the ThunderShirts. The bottom line is that ThunderShirtsmight help some dogs feel calmer during storms or fireworks. The science shows modest benefits, not miracles. Still, given their low cost, safety, and ease of use, they’re worth trying as one part of a broader anxiety plan.